Reverse Engineering
In this post, we'll demonstrate the Garbageman analysis tool. Garbageman is a .NET analysis tool that can be used to obtain information from packed or obfuscated .NET malware.
Here is a great blog on the internals of Garbageman. The TLDR is that Garbageman intercepts the memory management components of .NET and saves the information for future analysis.
Using this, we can easily obtain c2 information that has temporarily been allocated to memory during the execution of .NET-based malware.
Links to Relevant Files
Garbageman Download
Redline Sample Download
Initial Analysis
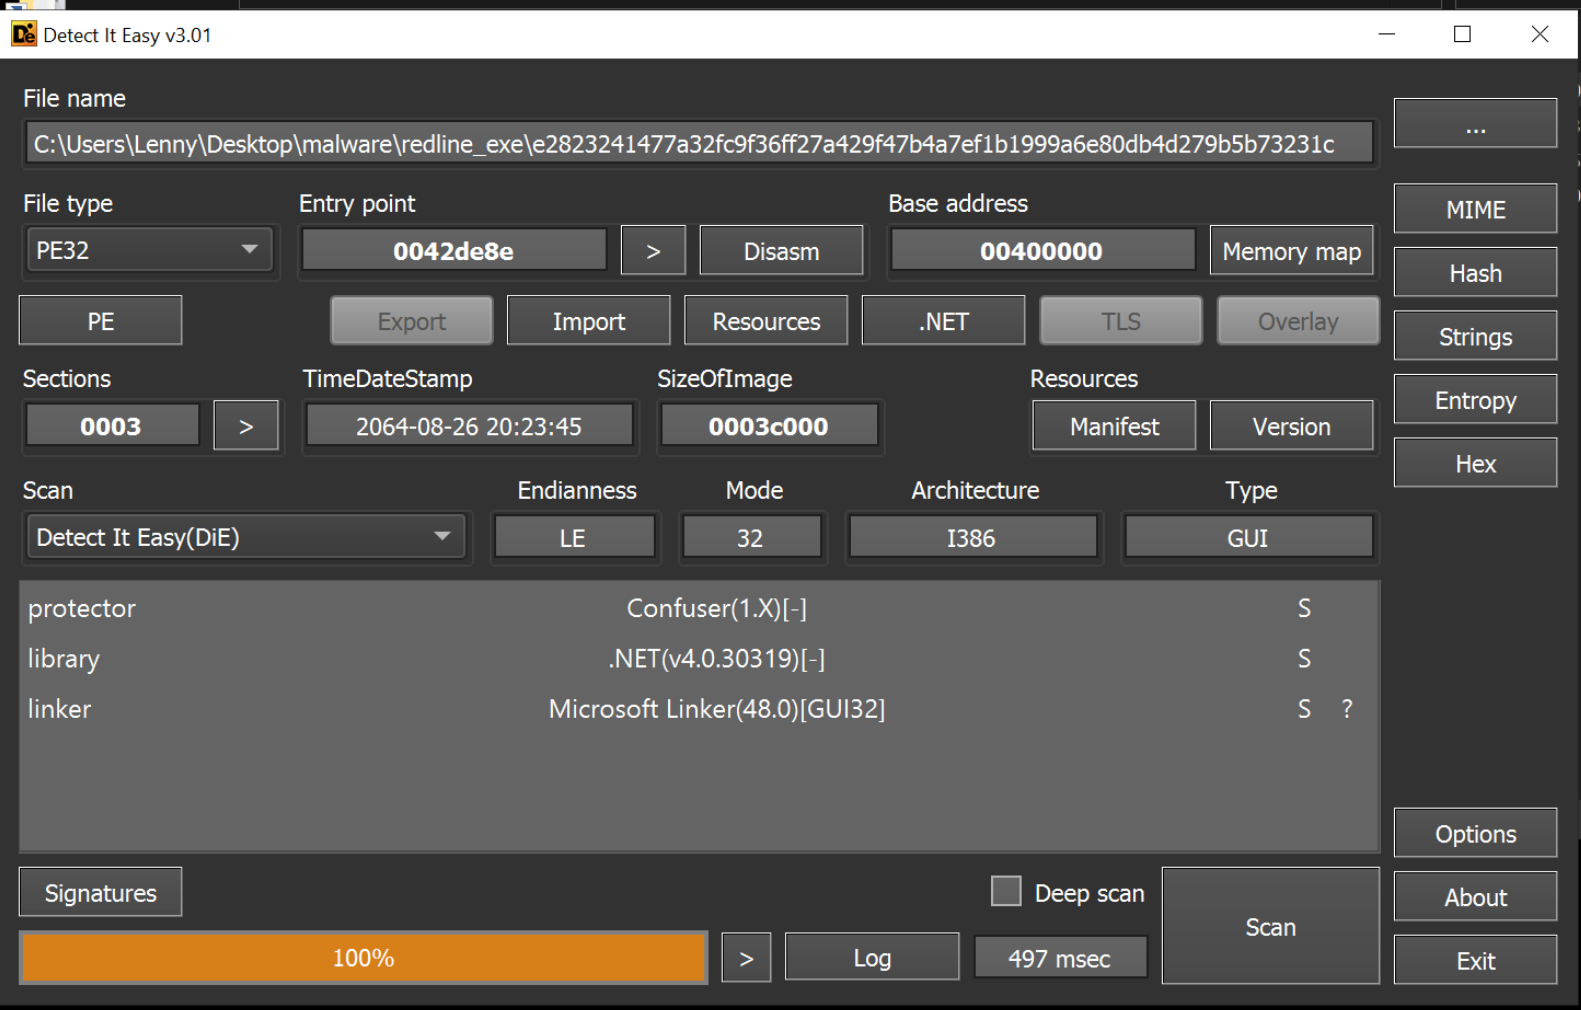
Upon downloading and unzipping the file with the password infected. We can observe using detect-it-easy , that the file is a 32-bit .NET executable that has been obfuscated using Confuser.
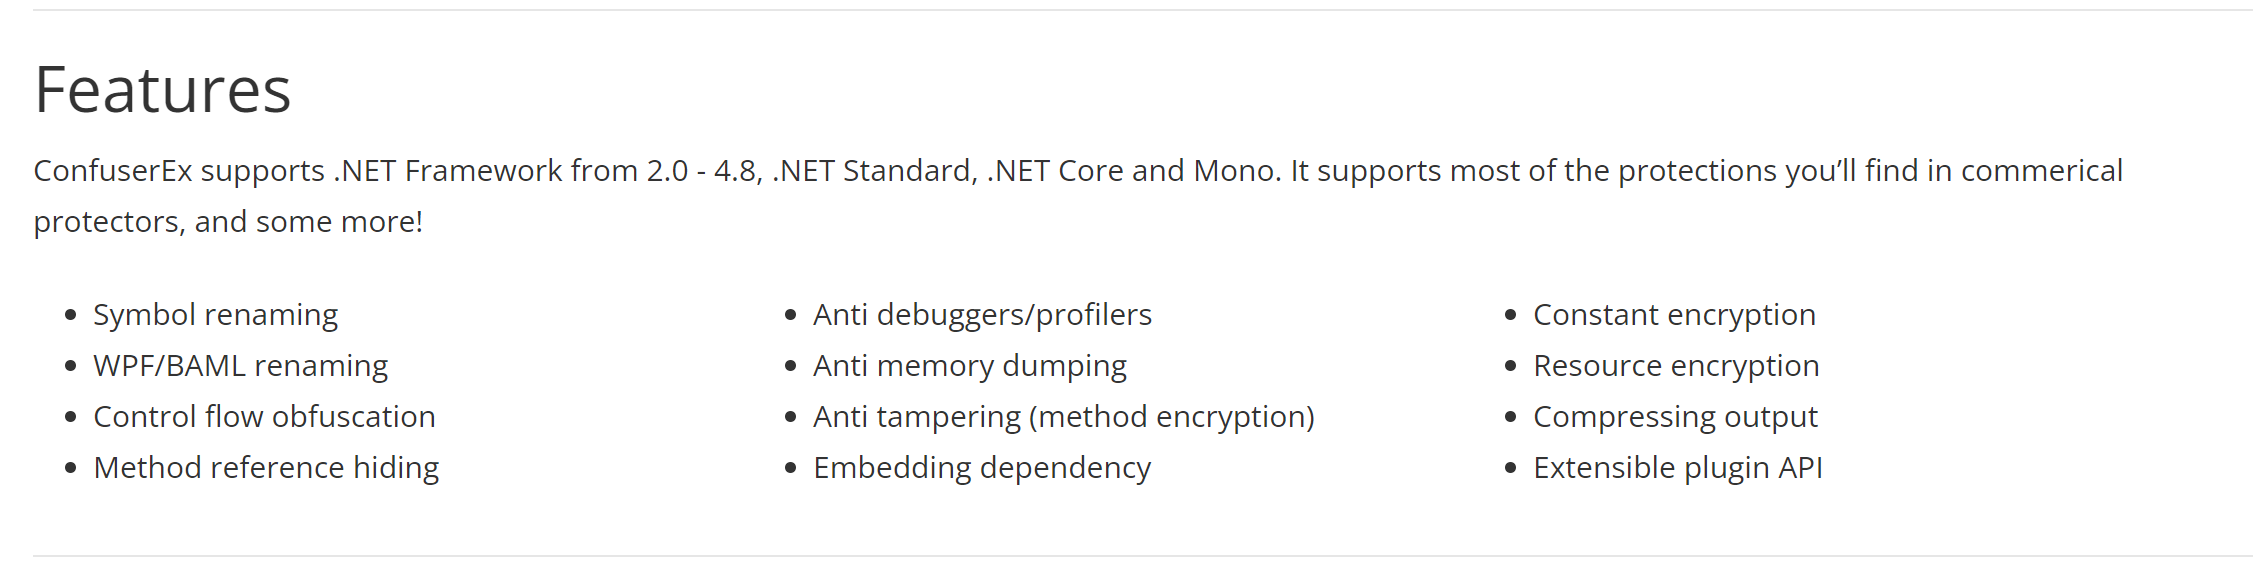
Confuser and its derivative ConfuserEx is a relatively complex obfuscator used to complicate the analysis of .NET executables.
Below we can see some features of Confuser.
Initial Analysis with DnSpy
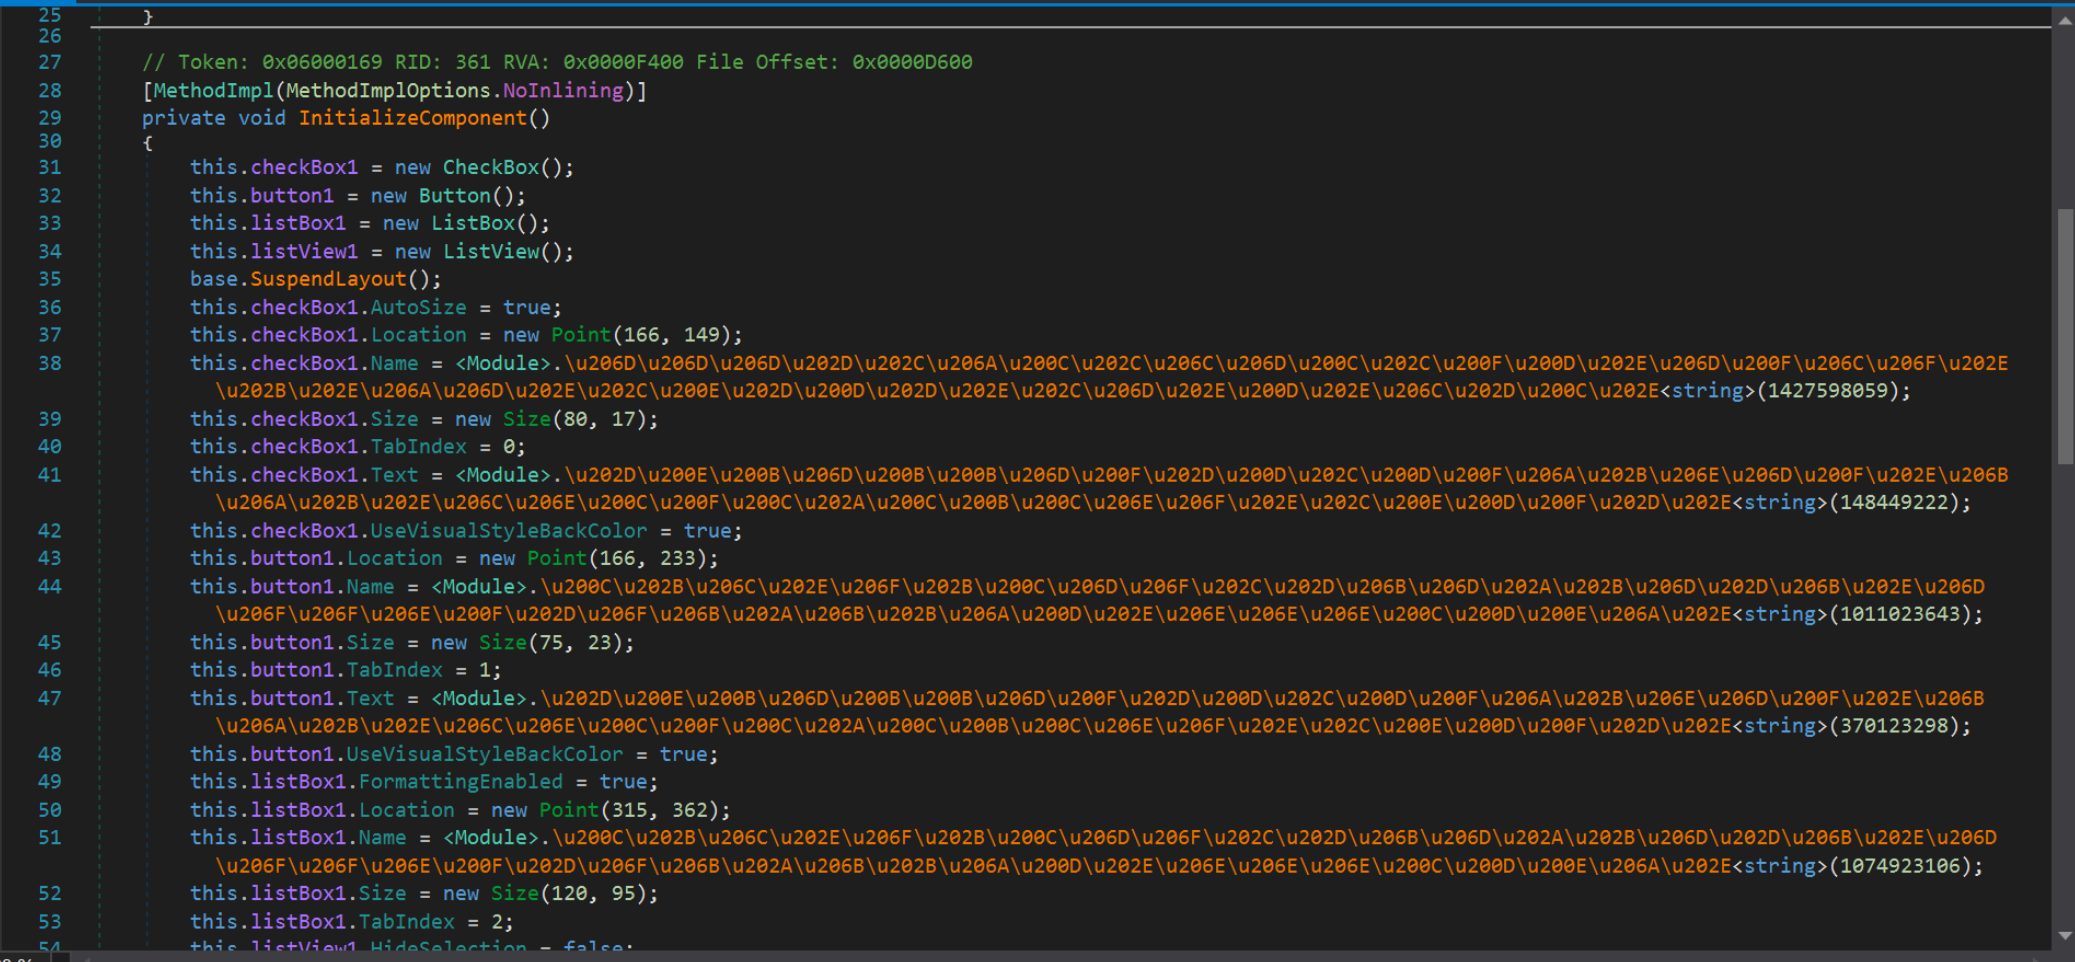
With the knowledge that the executable is .NET based, we can attempt to analyse it using the usual .NET analysis tool DnSpy.
Using DnSpy, we can see that the file is obfuscated and would likely require heavy manual analysis to proceed further and extract a c2 through manual methods.
Analysis With Garbageman
Once we confirm that the sample is. NET-based and reasonably well obfuscated, we can analyse the file using Garbageman.
Our primary goal here will be to try and extract a C2 address. We won't attempt to completely de-obfuscate the sample or determine it's full functionality.
To do this, we can install the Garbageman tool and attach it to the malware file.
To maximise the chances of obtaining a C2, we want to observe the malware from start to finish. So we want to use "execute" to launch a new copy, rather than attaching to an existing running copy of the malware.
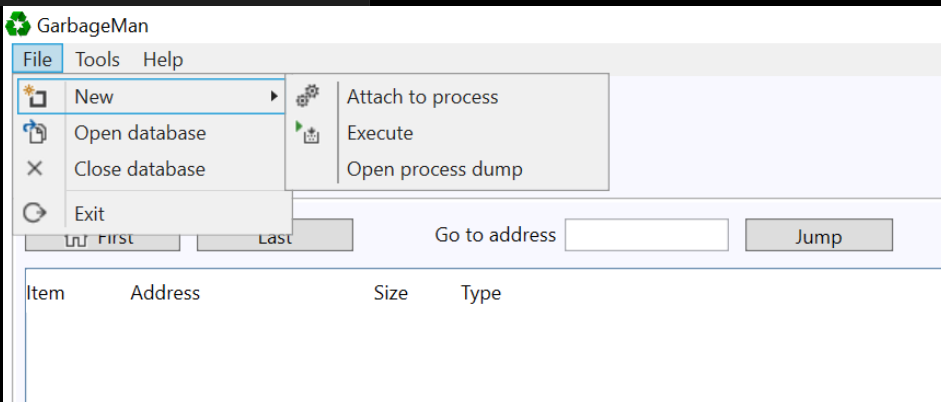
After selecting the Execute option, we can specify a path to our malware file
We also need to specify the number of snapshots that we want to take. This essentially tells Garbageman how many times we want it to scan for decrypted content.
Three is generally a good number to aim for, with an interval period of 1000ms (1s). This tells Garbageman to execute the file, wait 500ms, and then scan for decrypted content every 1s.
Different samples benefit from additonal snapshots or longer/shorter intervals. Three snapshots with a 1000ms interval is a good starting point, but you will want to experiment with different values for different samples.
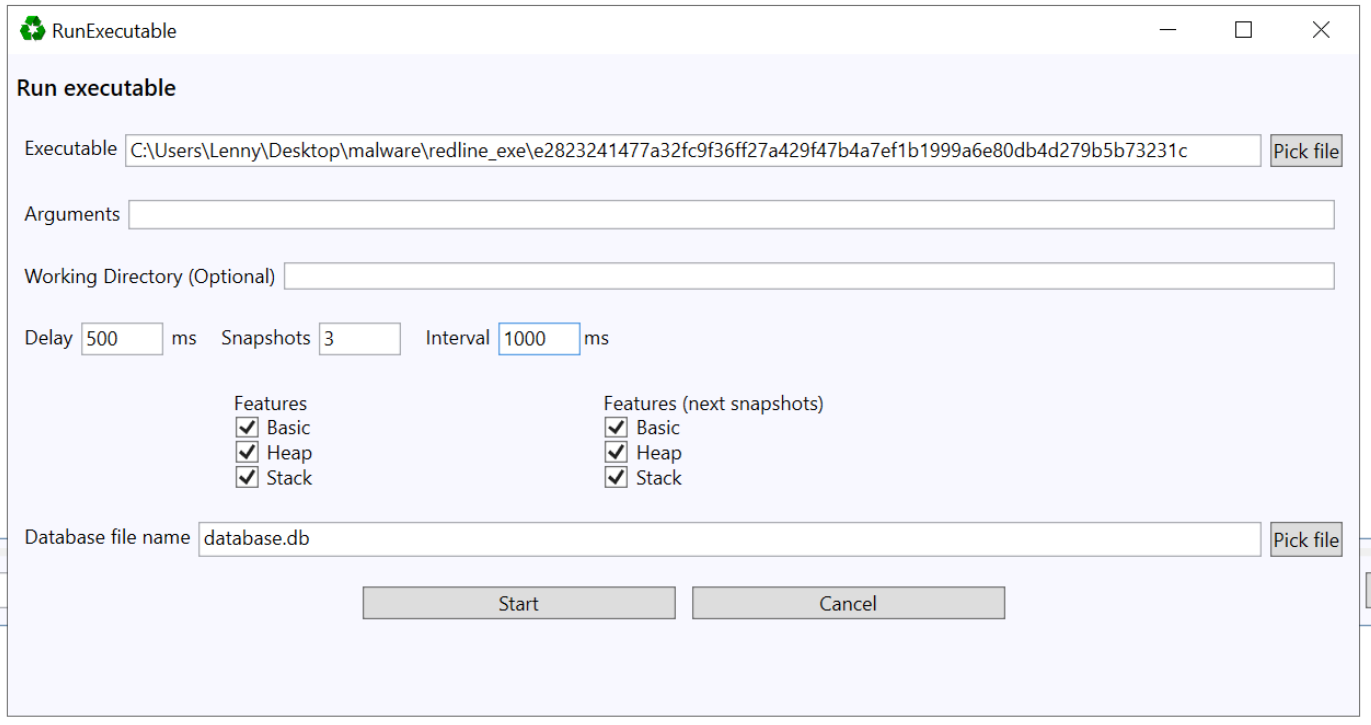
With these parameters selected, we can go ahead and "start" the execution.
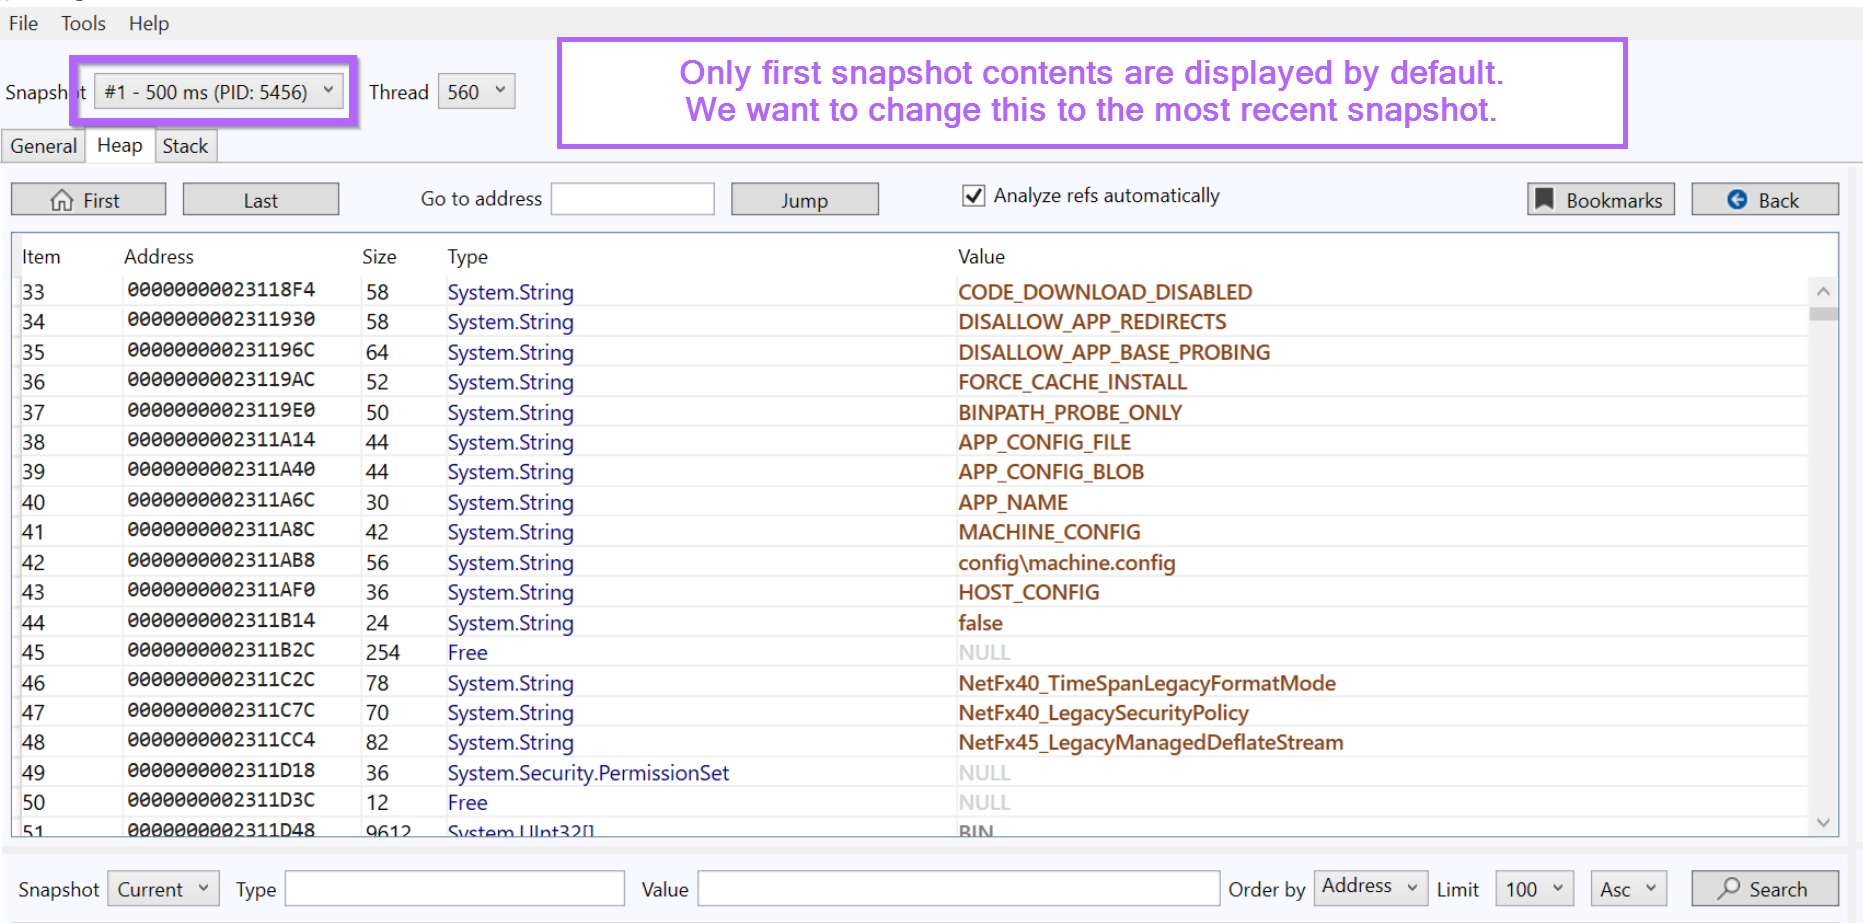
Within a few seconds, we can begin to see strings that were obtained during the execution of the malware.
By default, only the contents of the first snapshot are displayed. Generally we want to focus on the "last" snapshot and then work backwards.
We can fix this by changing the snapshot to snapshot #3
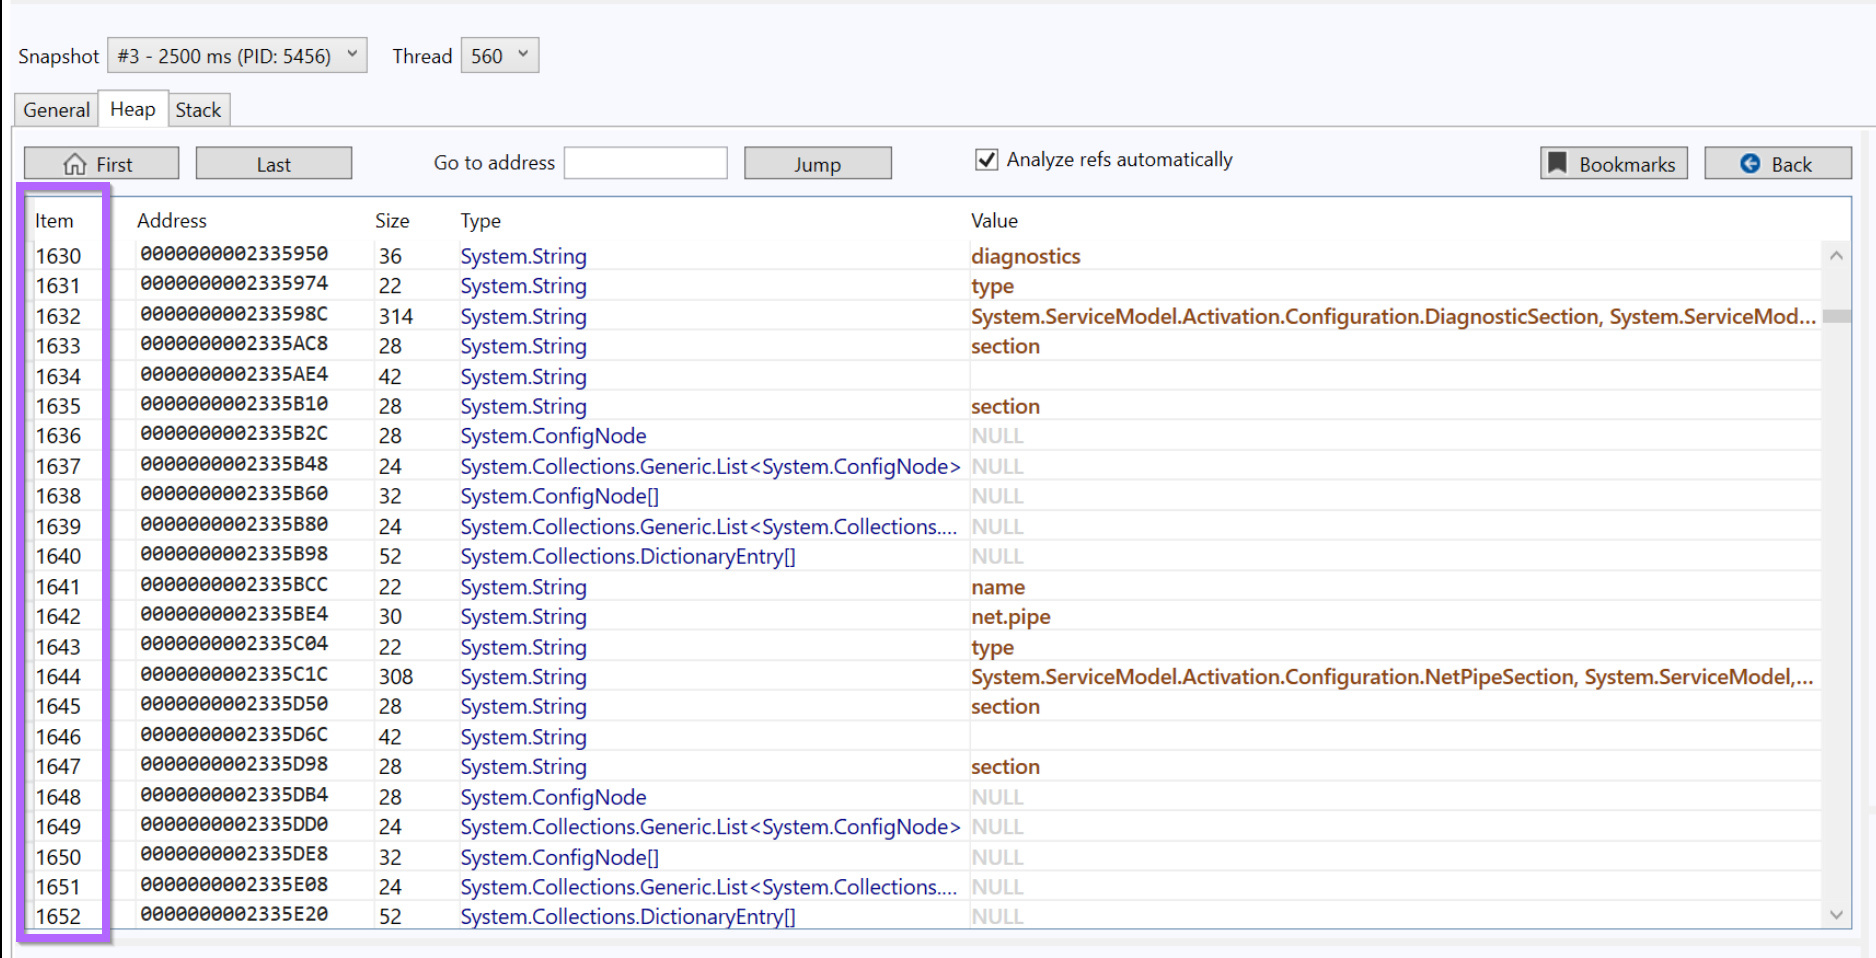
If the malware decrypted, accessed or created any C2 string during it's few seconds of execution. Then the C2 string will be contained within the displayed window.
The problem with this is that there are almost 20000 total strings and objects contained in that single snapshot. This is unwieldy and slow to manually scroll through without prior knowledge of what the C2 may look like.
Scanning for C2s with Garbageman
At this stage, we may already have the C2 string, but it's mixed in with approximately 20000 other strings.
To fix this, we can use Garbageman to search for URLs or IP strings present in the obtained data.
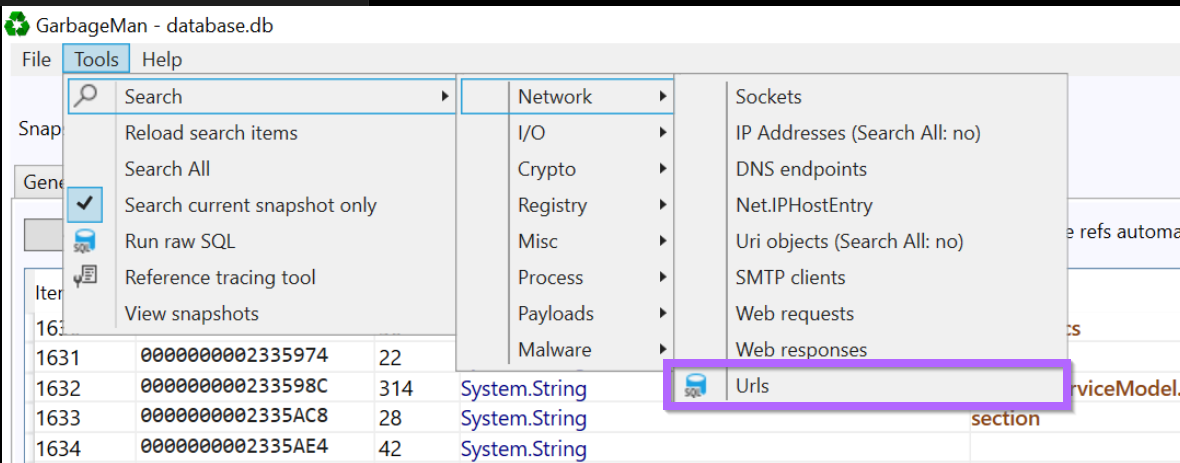
We can perform a URL/C2 string search using Tools -> Search -> Network -> Urls.
There is an IP Address option but this only searches for IP objects and not necessarily IP strings. For now we can just use the Urls option.
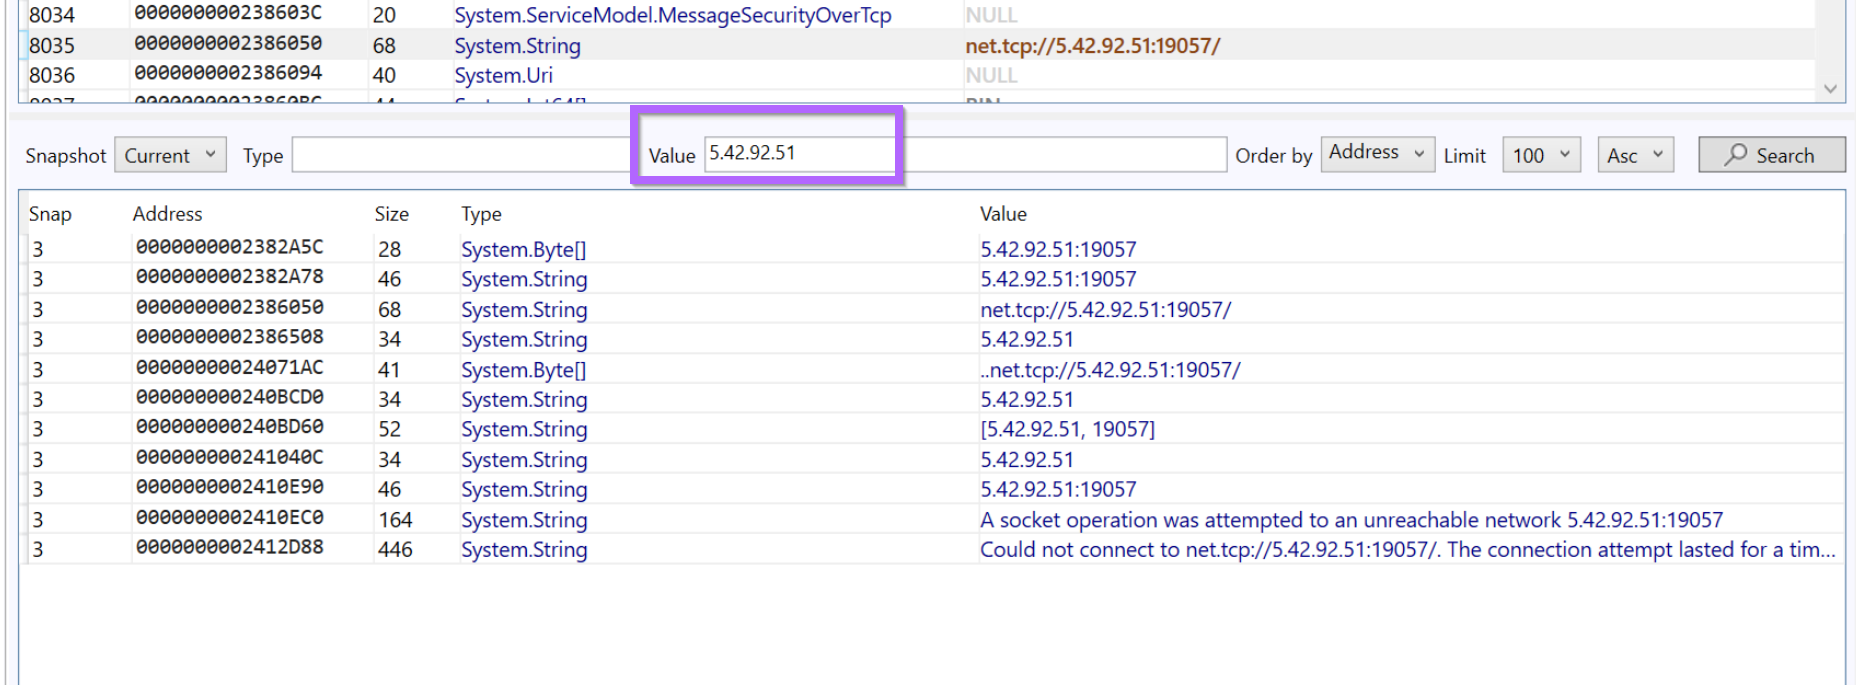
After performing the URL search, we are presented with an IP address 5.42.92[.]51 and port number 19057 that appears 3 times within the file.

Since we now have a suspected IP, we can perform a search with Garbageman to identify other occurrences.
By searching for the IP value we can observe 11 total references to the IP Address.
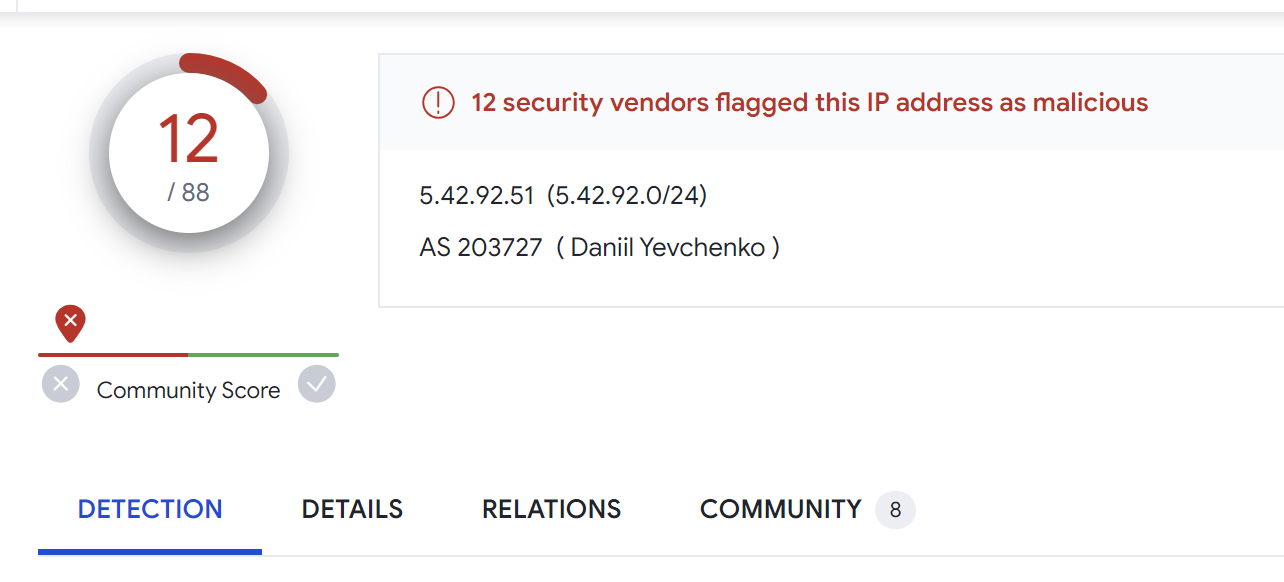
We can also search the IP on Virustotal to determine if it has been seen before. Searching for the IP on Virustotal returns 12/88 hits.
Identifying Additional Servers
At this point we have now easily extracted the single C2 address contained in the malware file. This is great but there is a lot more we can do with that single C2.
Using the identified C2 server of 5.42.92[.]51, we can use Censys to identify patterns that may lead to additional servers.
This topic will be covered in the next post, where 15 additional servers are identified from the initial c2 discovered in this sample
Identifying Simple Pivot Points in Malware Infrastructure - RisePro Stealer
Identifying Simple pivot points in RisePro Stealer Infrastructure using Censys.
 Embee ResearchMatthew
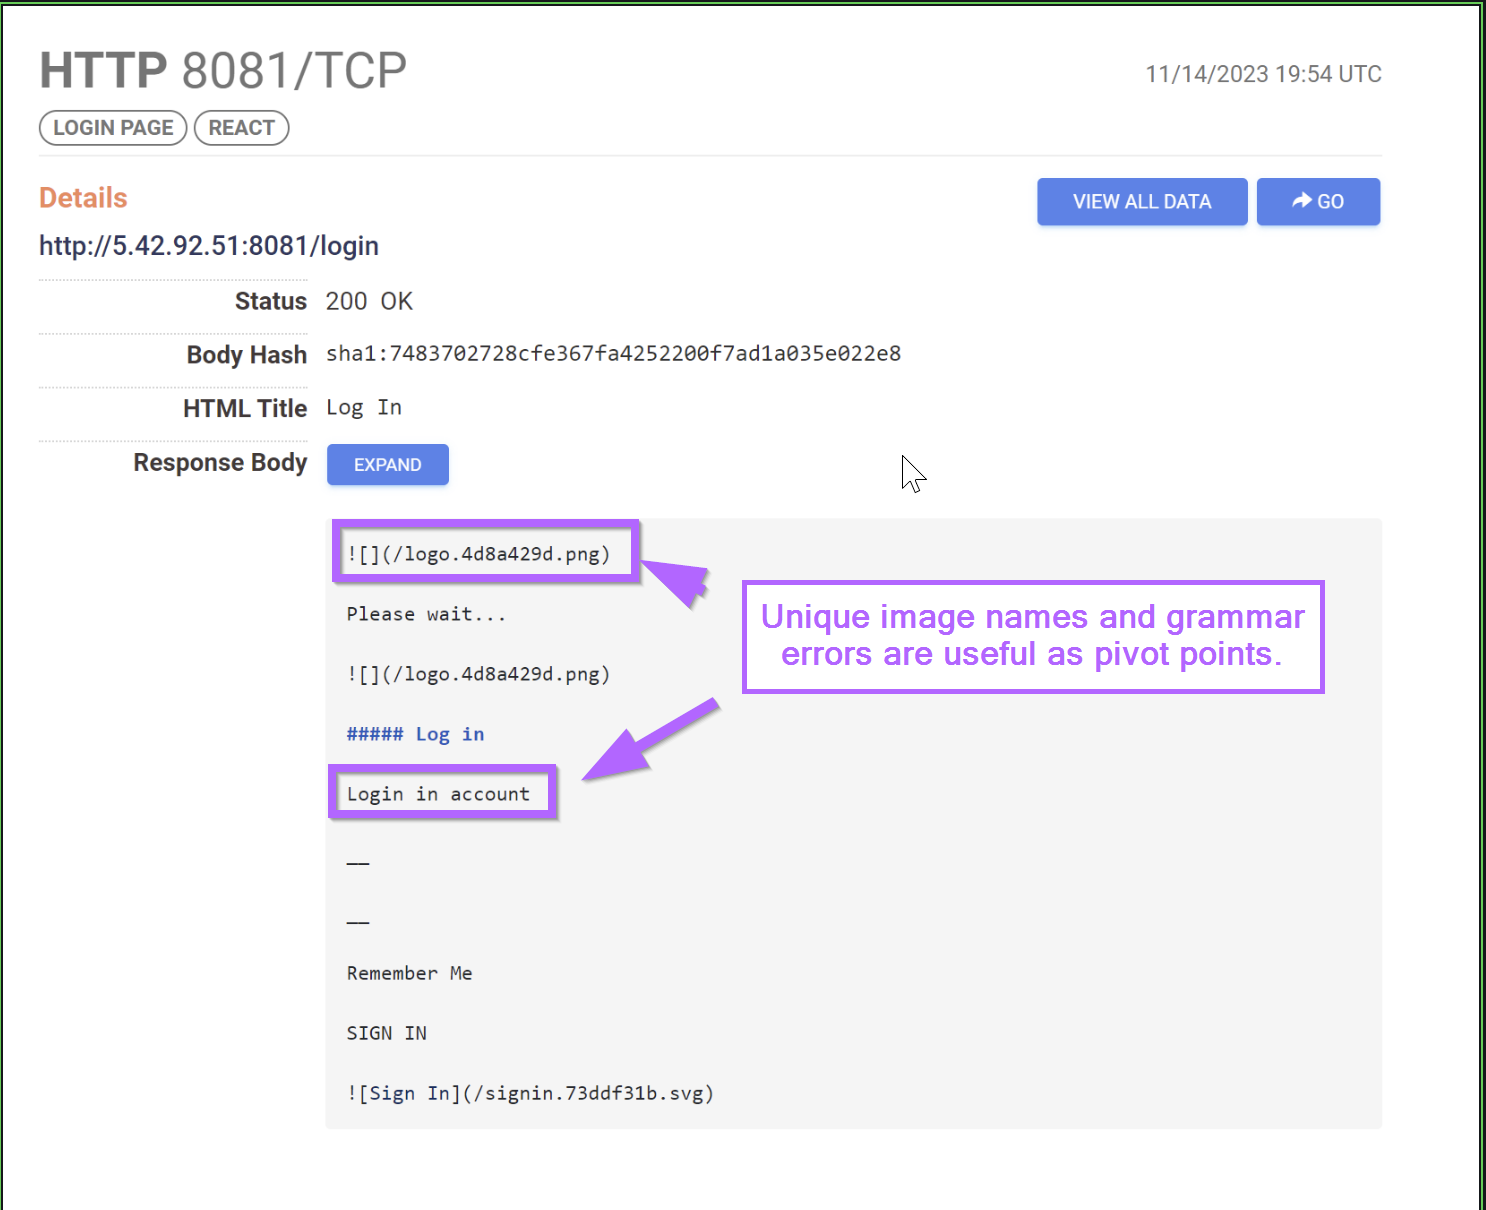
Sign up for Embee Research
Malware Analysis and Threat Intelligence Research
No spam. Unsubscribe anytime.